Manage Service Principals
Manage Service Principals—OAUTH and Client Secret
The Client ID Client Secret type is an OAUTH type that is an OIDC type of authentication and authorization, and is a static credential that is exposed to the client. The Client Secret does not expire.
Client IDs (different than Client ID Client Secrets) are not sensitive and are visible.
The generated static Client Secret is sensitive and is only shown ONE time, when it is generated.
The Client Secret does not have an expiry time period and is indefinite. If needed, a new Client Secret can be generated at any time, usually for one of the following reasons:
- When concern exists that the Client Secret has been compromised
- When a Customer has a Security rotation policy that requires regular rotation of the Client Secret
Create (ADD) an OAUTH and Client Secret
Service Principals are specific to the environment (for example: development or production).
![]()
On the Secure Module Main Page which is the Manage API Roles page, click on the Left Navigation Secure Module sub-menu—Principals icon (as shown in Figure 68).
The Secure Module—Manage Service Principals page opens (as shown in Figure 69).

Click on the Add New button in the upper right (as shown in Figure 70).
The Add New Principal window opens (as shown in Figure 71).
![]()
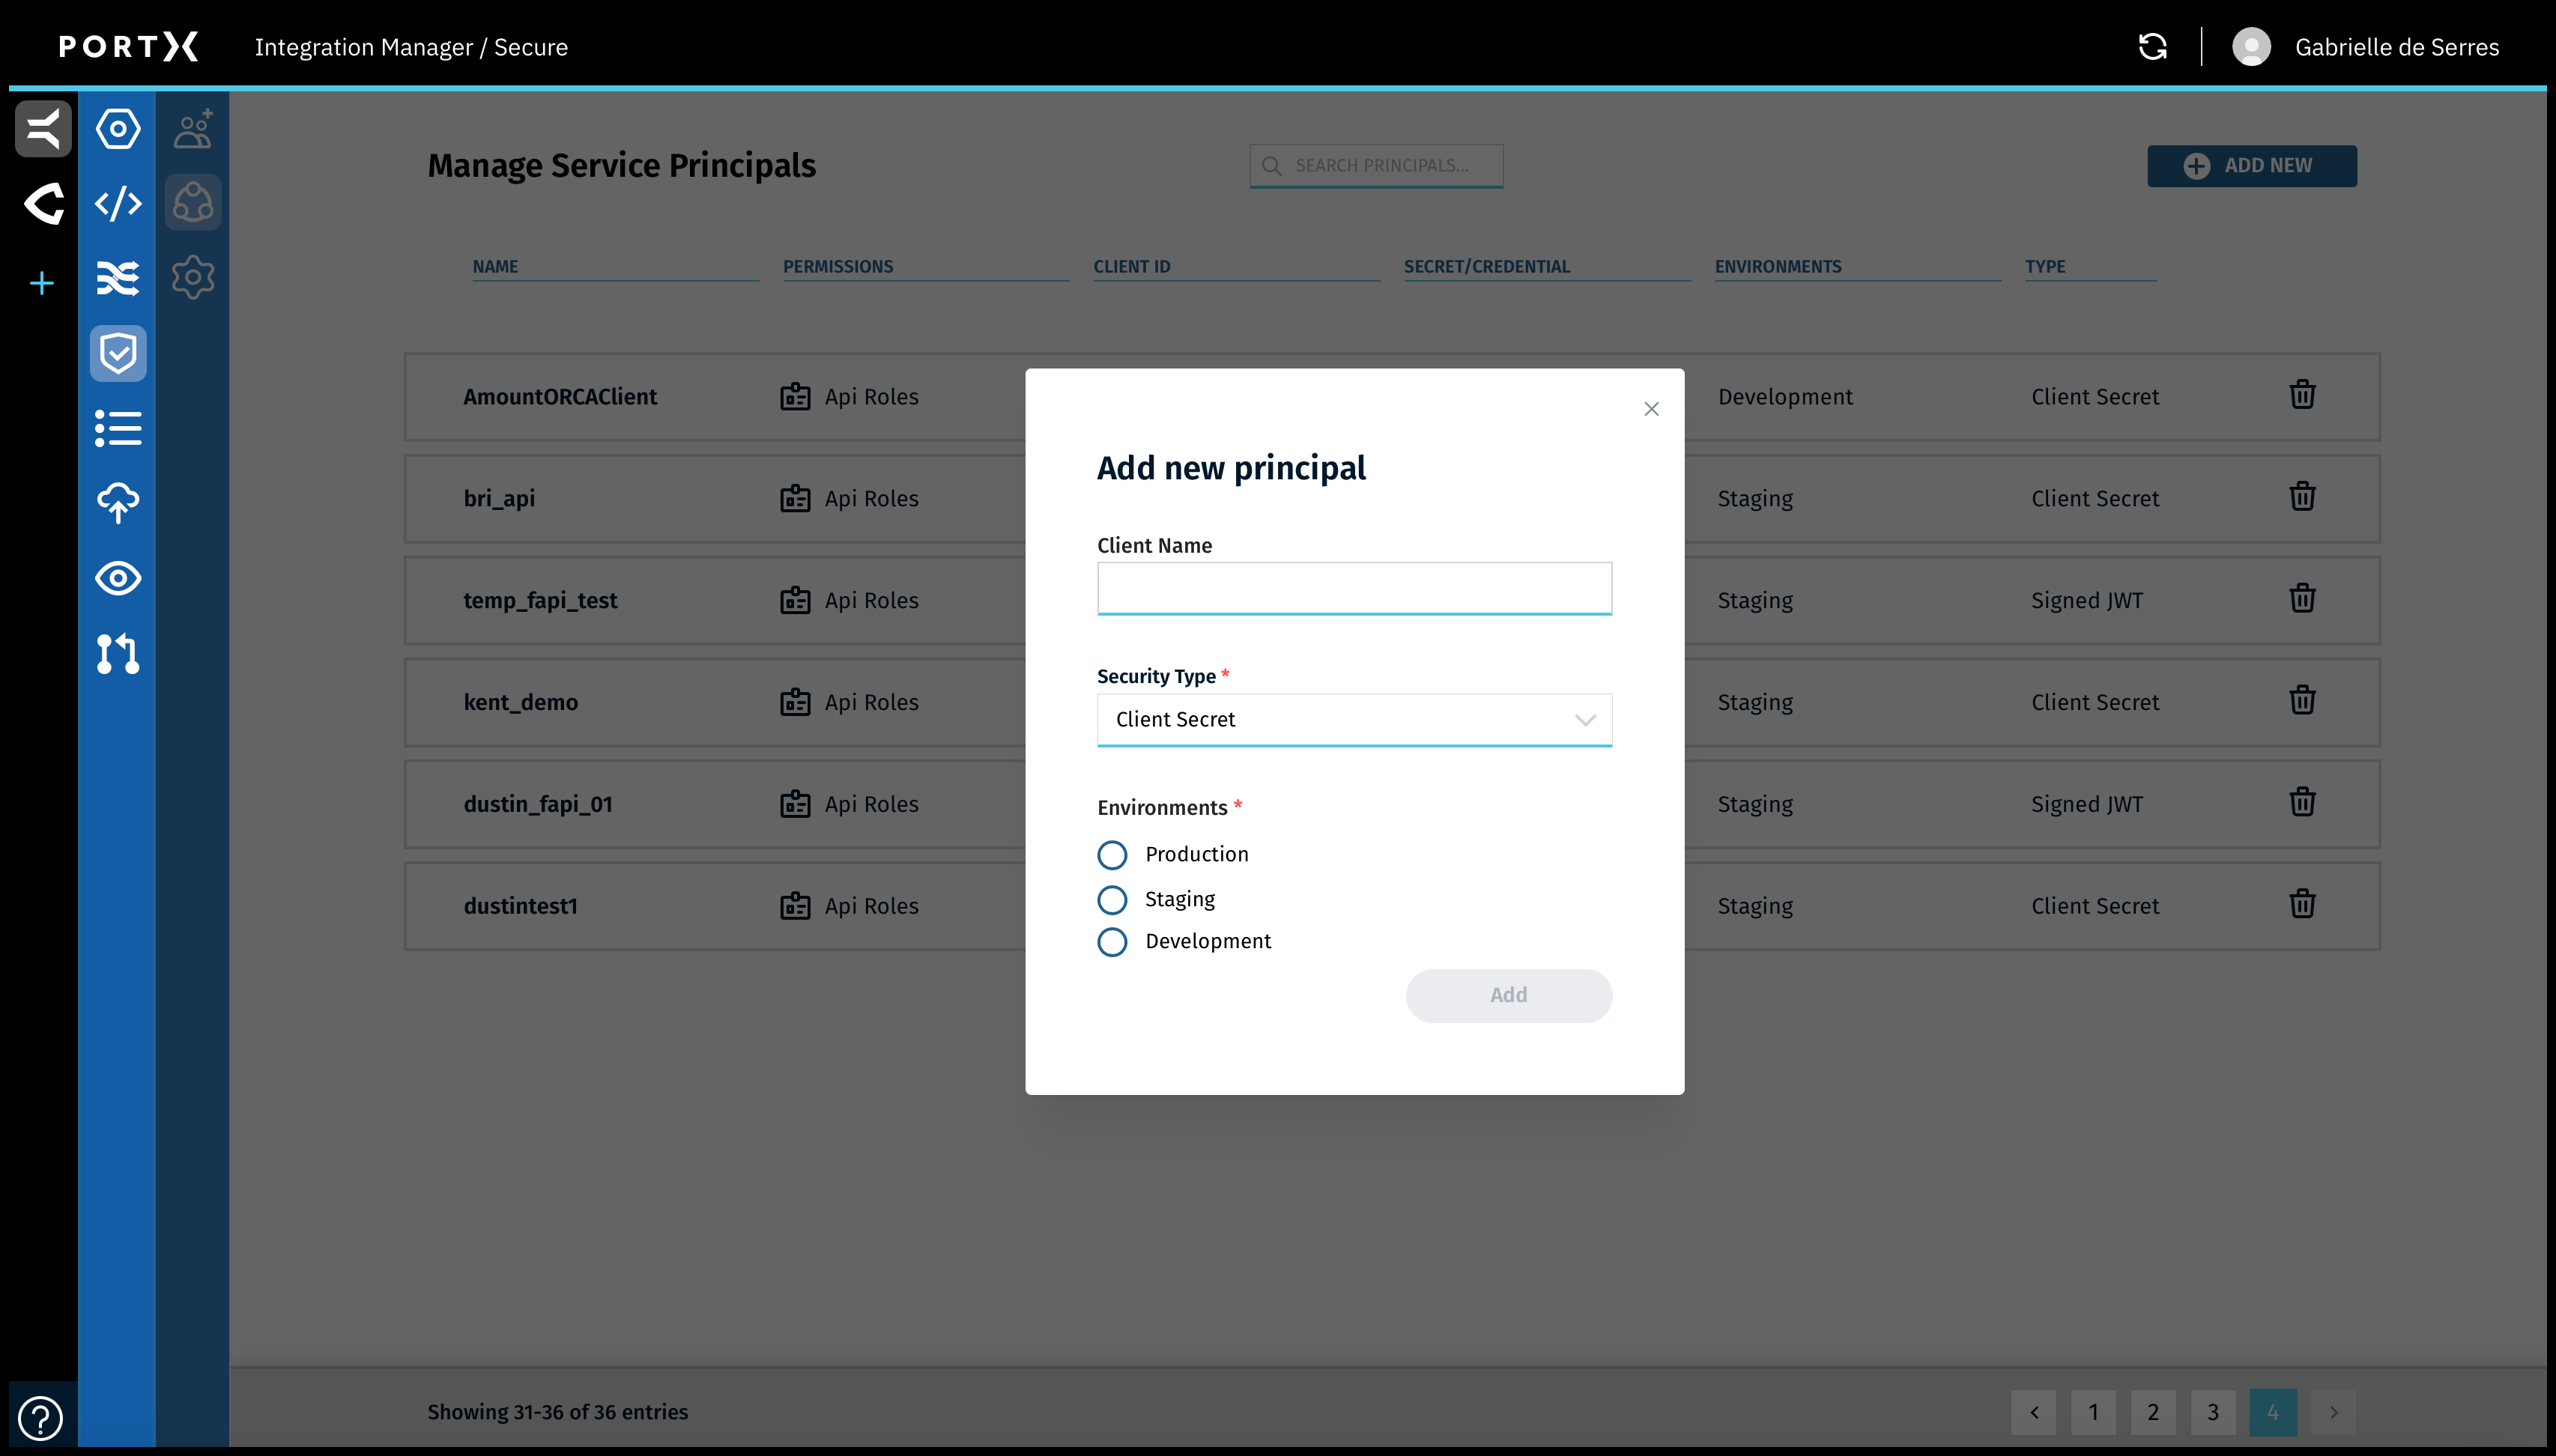
In the Add New Principal window, enter the following information:
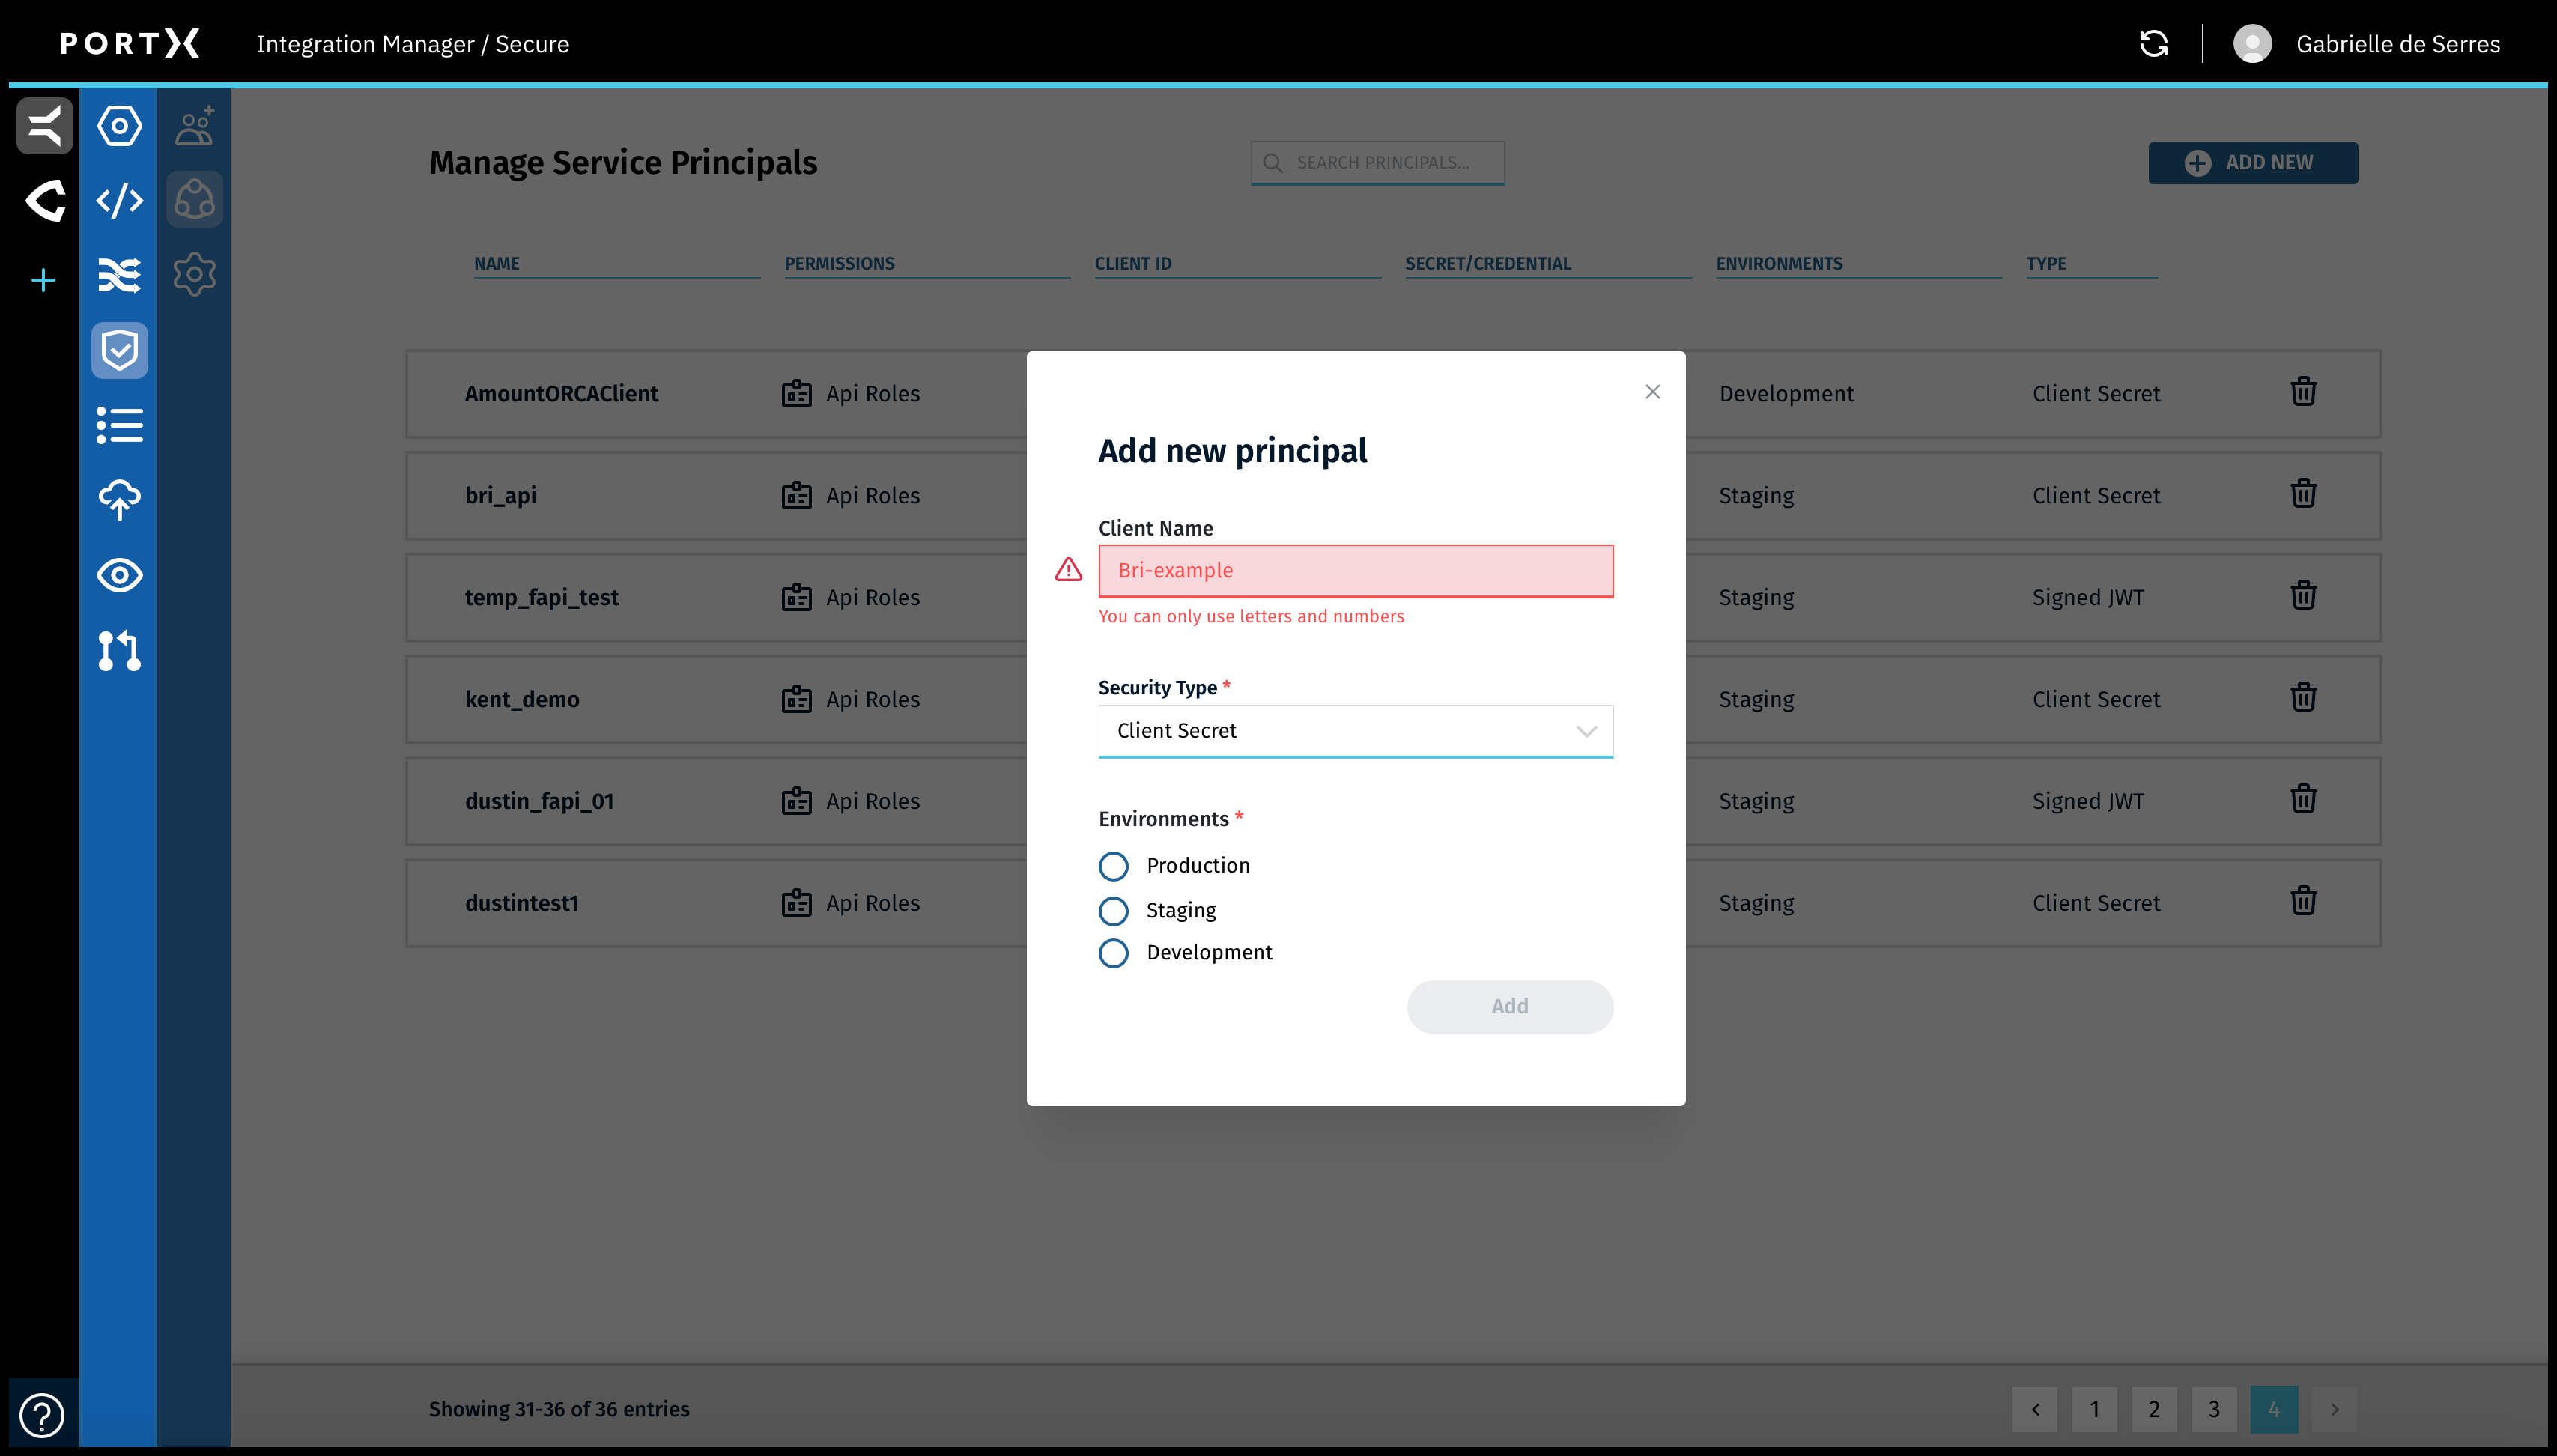
- Client Name
- Must be at least 5 characters
- Can only use letters, numbers, underscores
- Can not use special characters (as shown in Figure 72)
- Security Type—select Client Secret from the following choices:
- Client Secret (OAUTH)
- Signed JWT (FAPI)
- Environment—select the relevant environment
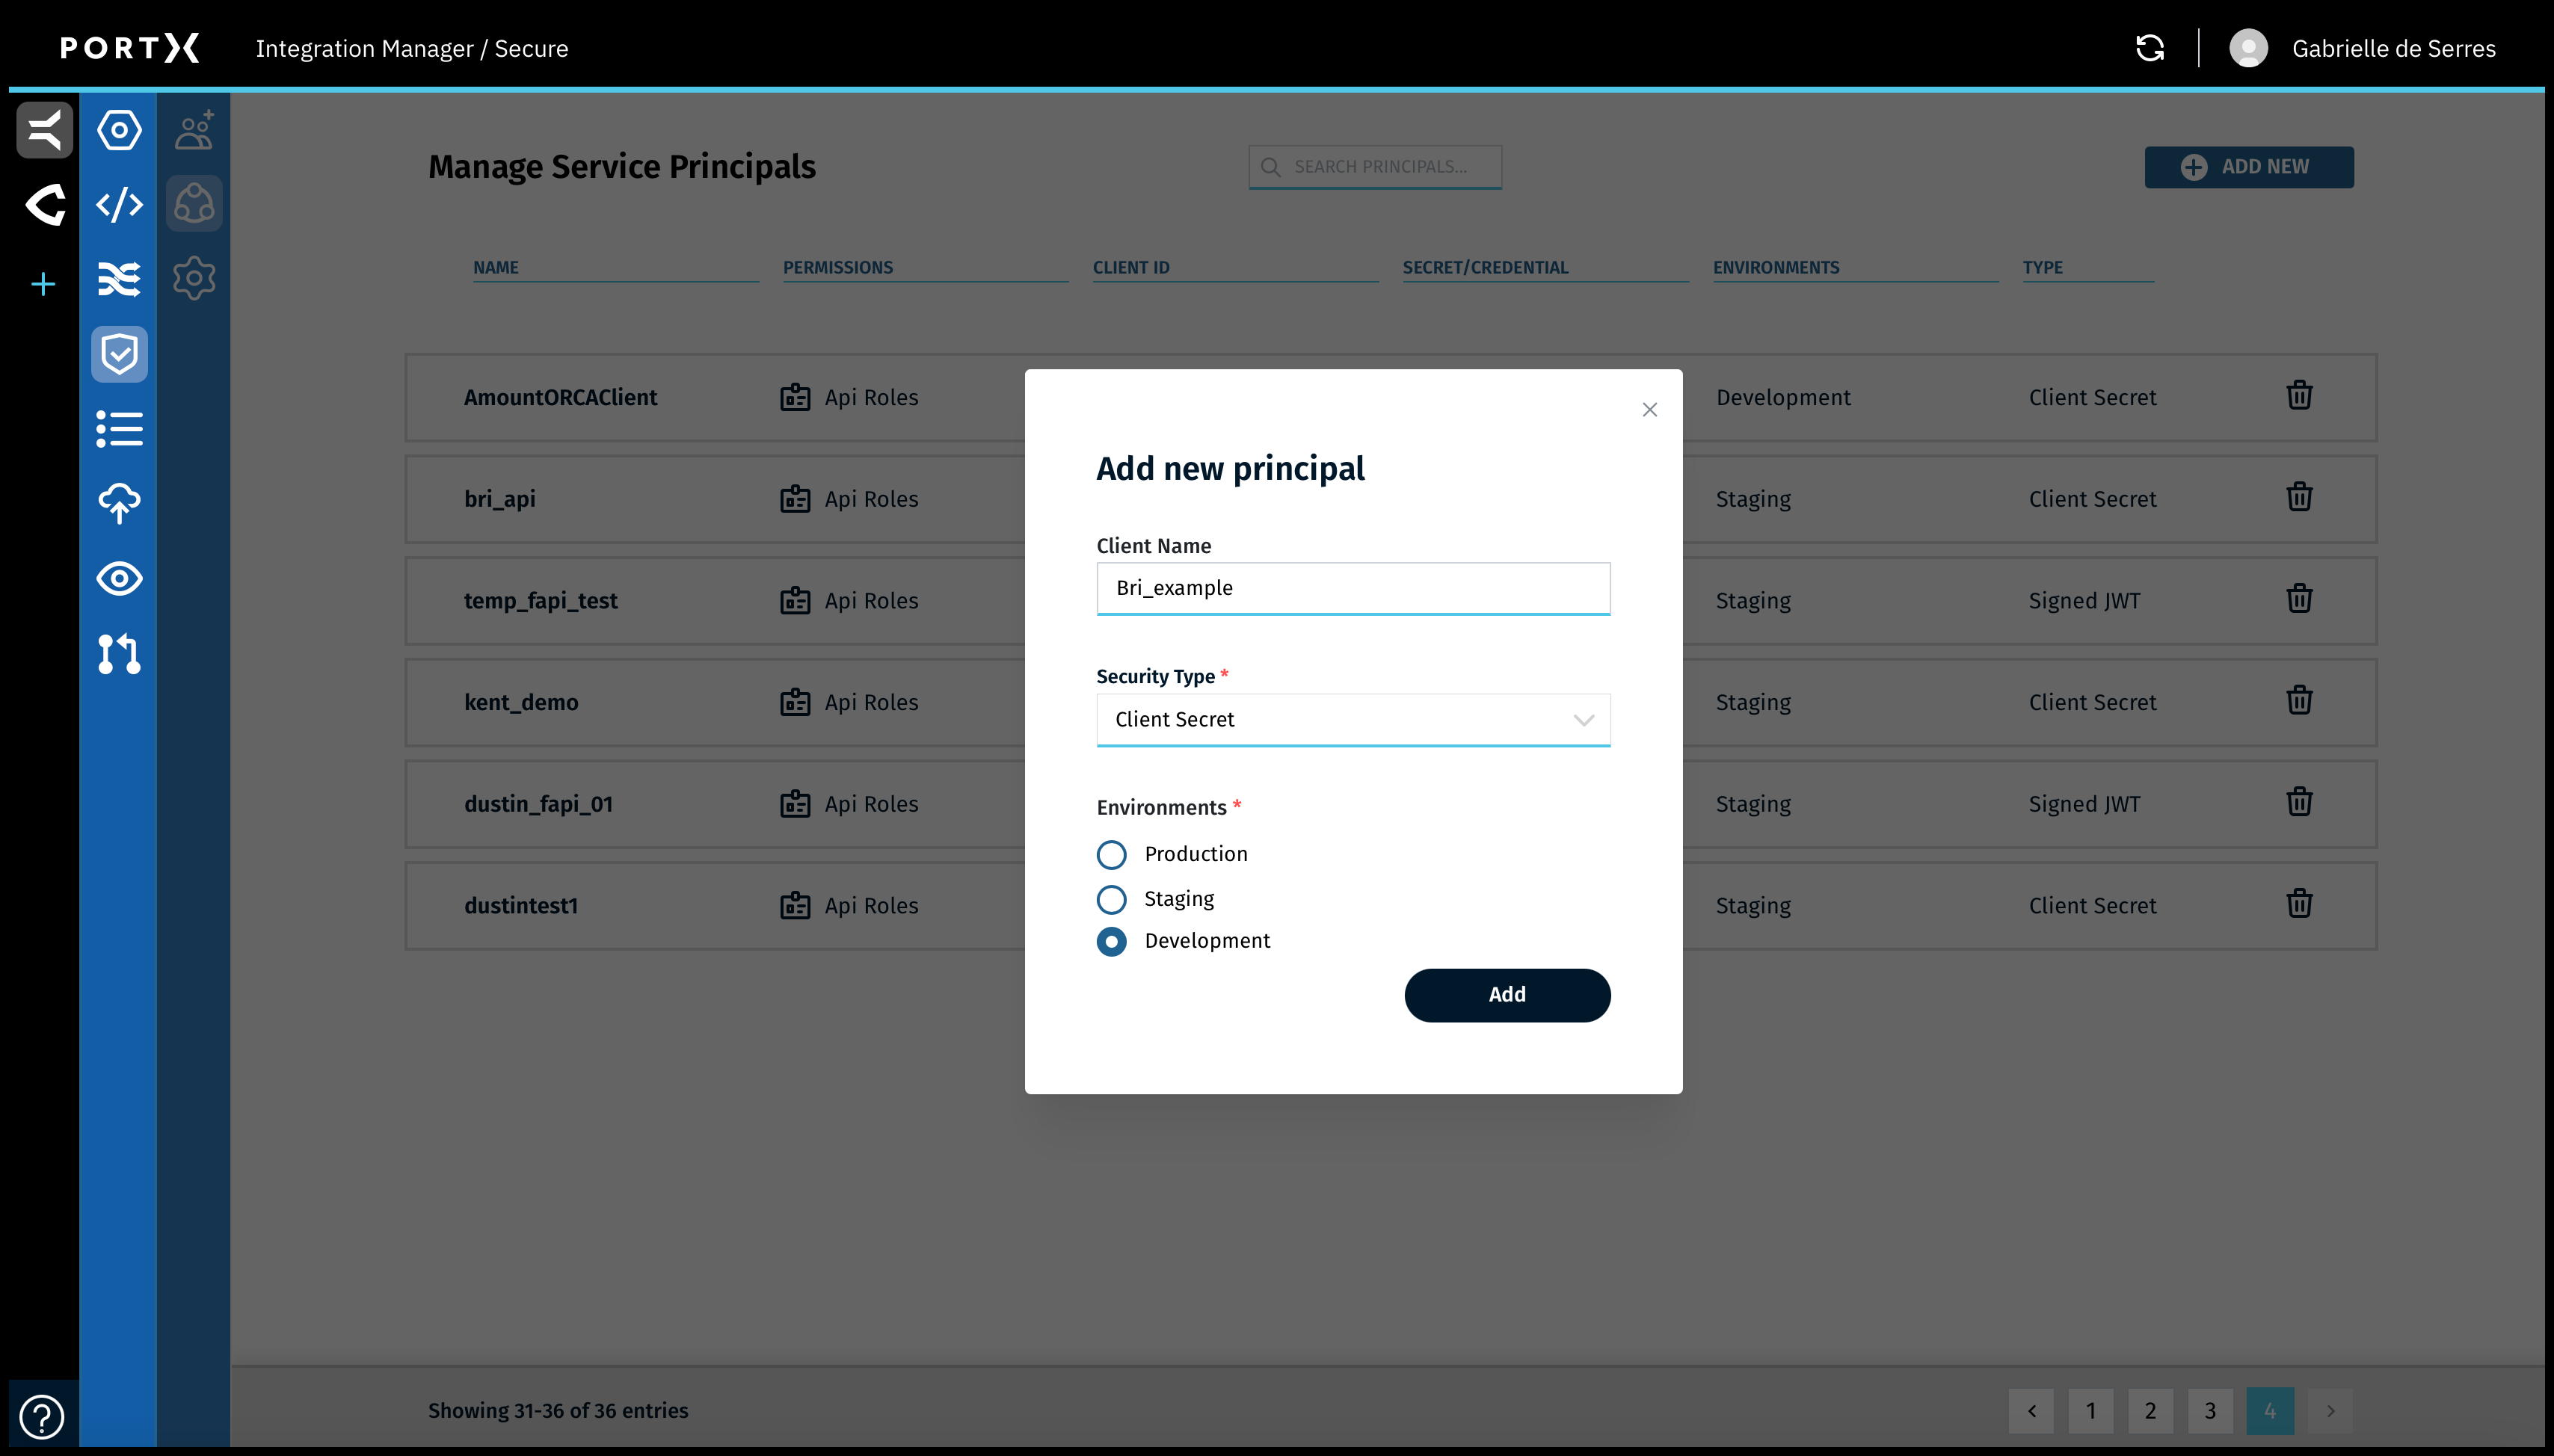
After selecting the Environment, the Add button becomes selectable.
Review the information.
Note: When you create the new Service Principal, the Client Secret is shown ONLY ONCE in a pop-up window and is NOT retrievable later.
Record and store the Client Secret securely. If you do not record and store this information, you will need to generate a new Client Secret and record and store that one.

and the Client Secret is Visible and Accessible ONLY this One Time
Click on the Add button (as shown in Figure 73).
The following responses occur (as shown in Figure 74):
- The new Service Principal is created
- The new Service Principal is added to the list of Service Principals on the Service Principals pages
- The pop-up window showing the Client Secret appears ONLY this ONE time, and is not shown again, nor retrievable.
- Screen capture it, write it down, or copy it to the Clipboard and paste it immediately somewhere secure and store it securely.
Copy the Client Secret to the Clipboard, then immediately paste it in a secure document, or screen capture it and store it securely.
A confirmation Success banner message stating the new service has been added, with a green check mark in the upper right of page, appears BRIEFLY (a couple of seconds) as shown in Figure 74.
Copy the Client Secret to the Clipboard
In the pop-up window showing the Client Secret itself, to the right is the document icon (as shown in Figure 74). Click on the document icon and the Client Secret content is copied to the Clipboard (as shown in Figure 75).
In the pop-up window, the document icon changes to a green check mark, with the word “Copied!”
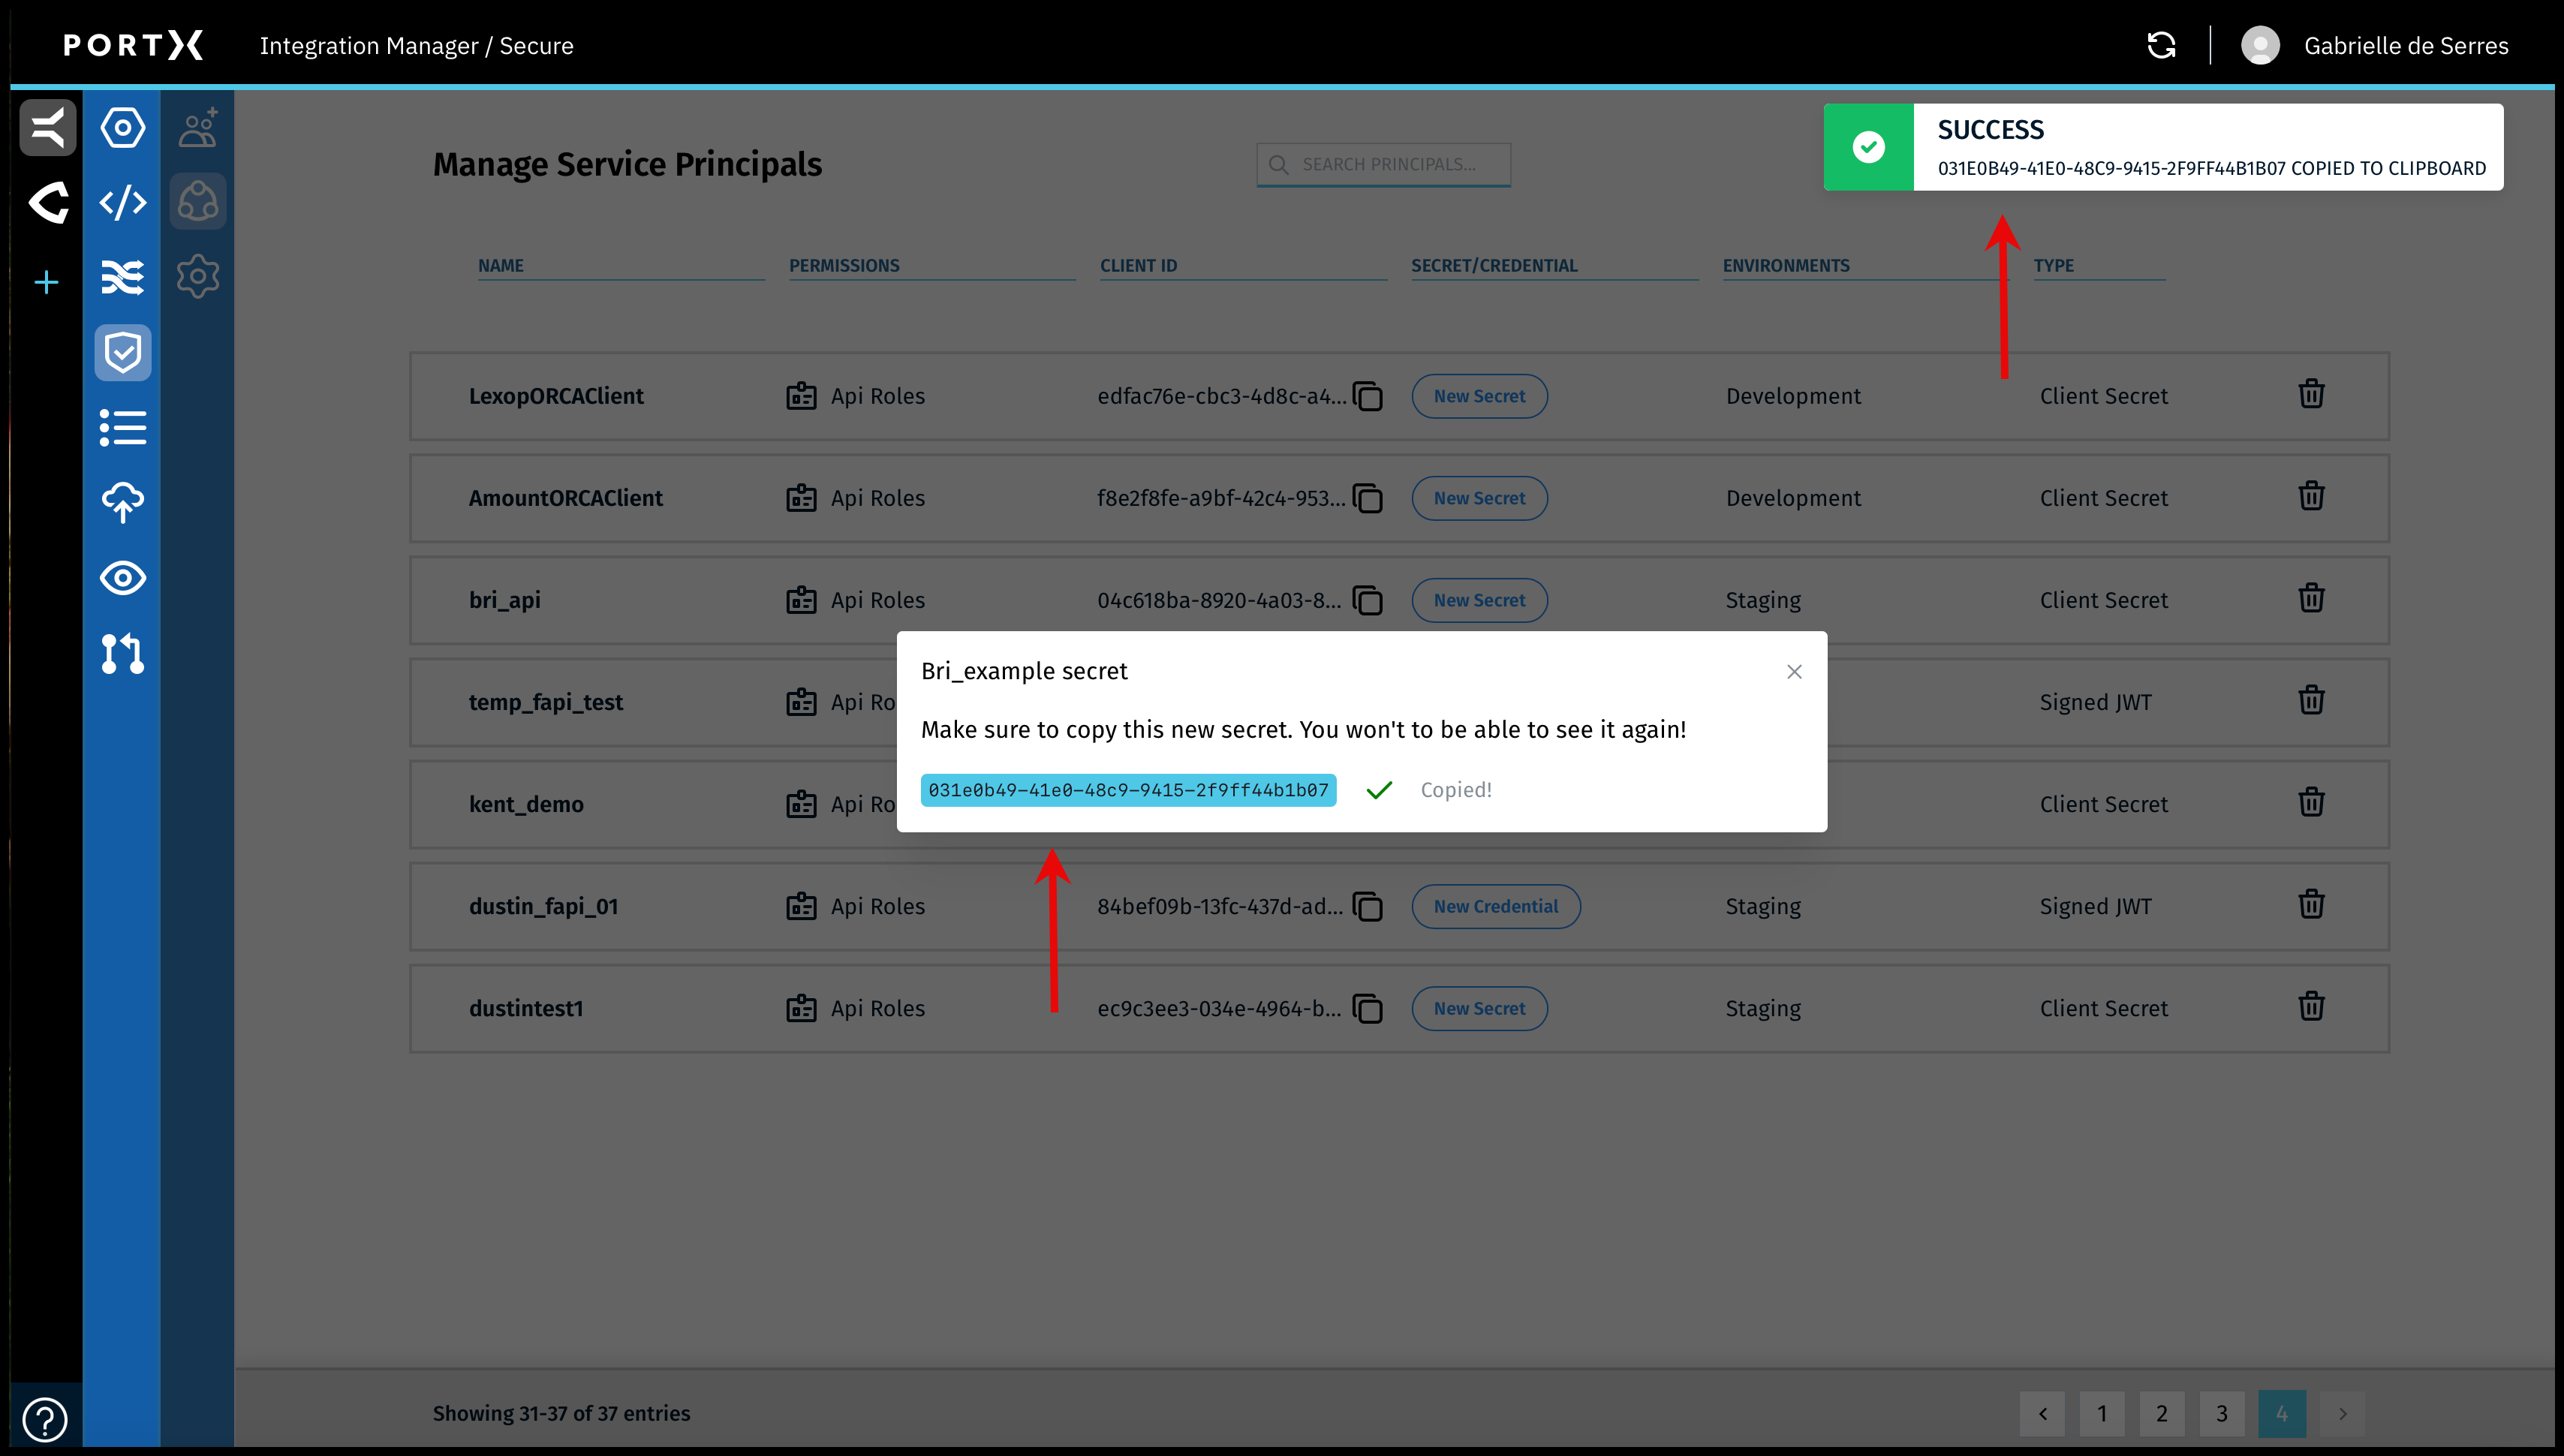
and You have Successfully Copied it to the Clipboard to Copy it to Someplace Secure