Manage Service Principals
Manage Service Principals—FAPI and Credential
The PortX Platform’s Integration Manager provides a Financial-Grade API (FAPI) option for customers who need robust API authentication and authorization solutions.
Organizations should still use Client Secrets when they don’t need the FAPI option. An organization chooses when creating or adding each service principal which security type, whether it will be OAuth and Client Secret, or FAPI and Credential.
FAPI credentials must be created then used.
FAPI credentials have 3 components:
- Passphrase to decrypt .key file
- .KEY file
- .CRT file
Create (ADD) a FAPI-Enabled Credential
FAPI credentials expire at 1 year. (Whereas OAuth Client Secrets do not expire.)
Two (2) FAPI credentials can exist at the same time. A new credential can be generated and put into use before the old one expires.
![]()
On the Secure Module Main Page which is the Manage API Roles page, click on the Left Navigation Secure Module sub-menu—Principals icon (as shown in Figure 76).
The Secure Module—Manage Service Principals page opens (as shown in Figure 77).

![]()
On the the Secure Module—Manage Service Principals page, click on the Add New button (as shown in Figure 78).
The Add New Principal window opens (as shown in Figure 79).
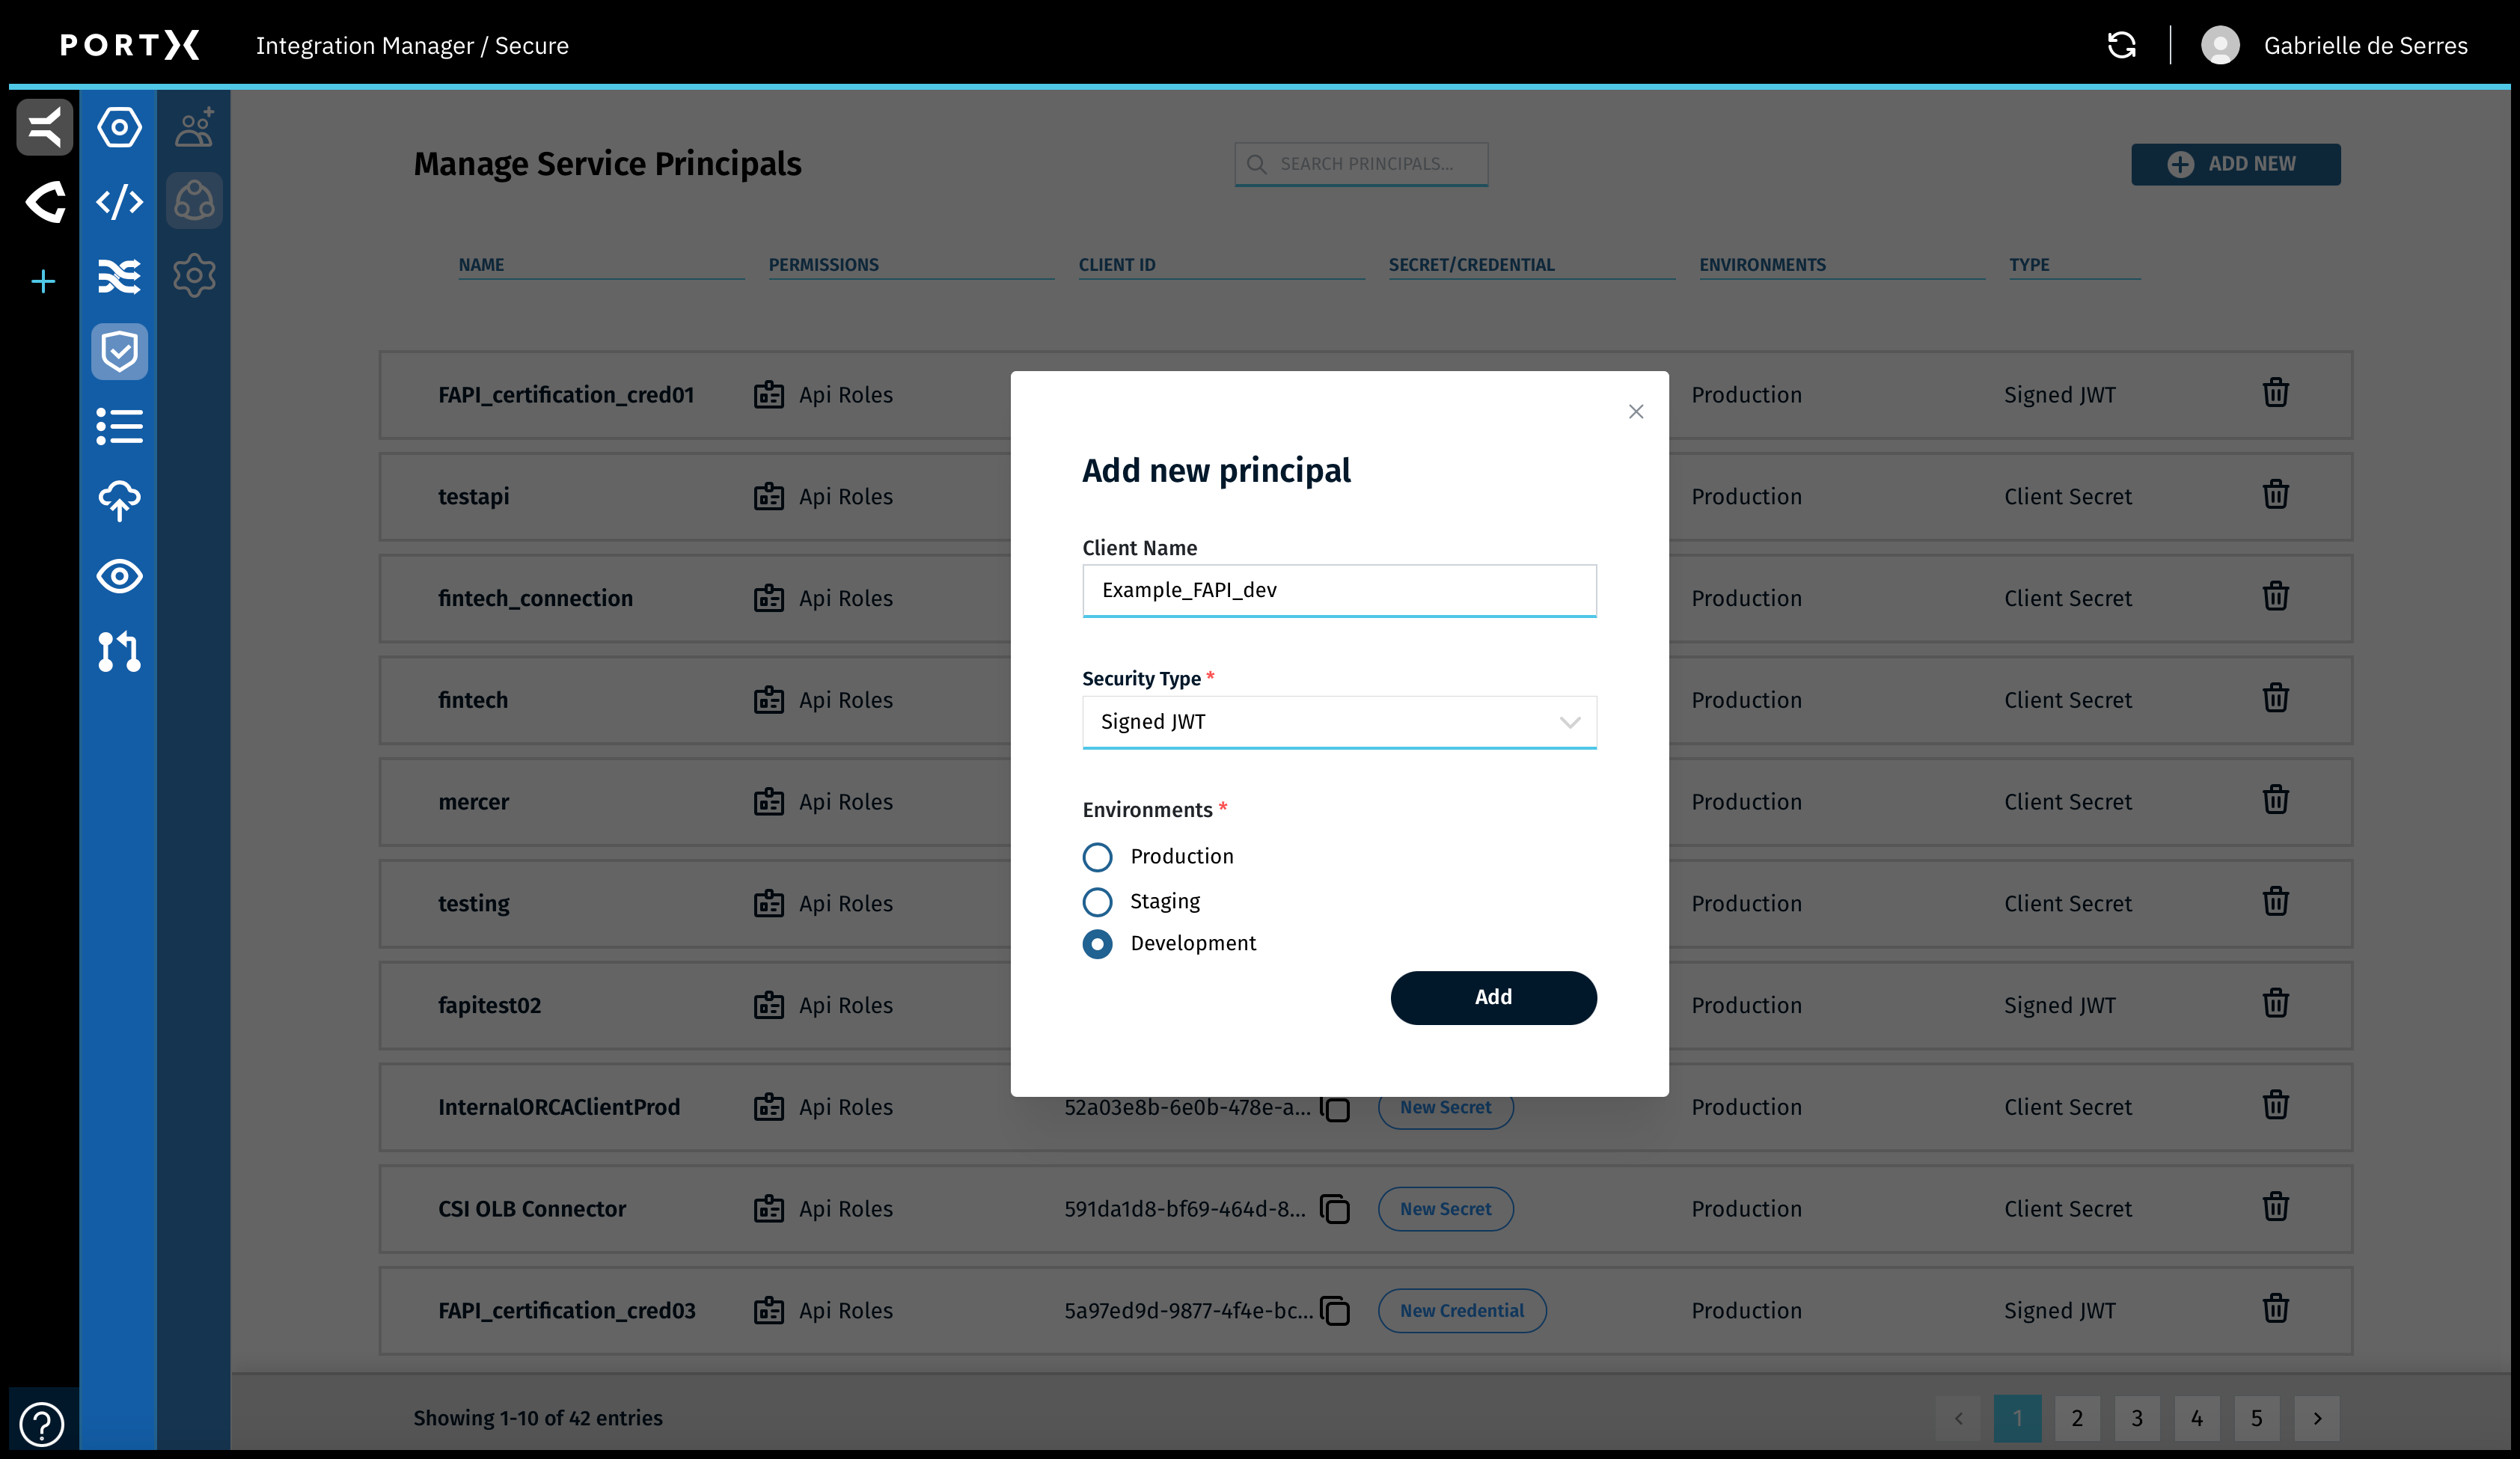
In the Add New Principal window (as shown in Figure 79), enter the following information:
- Client name—a unique name no spaces
- Security Type—Signed JWT(FAPI)
- Select one of the following environments:
- Production
- Staging
- Development
Click on the Add button.
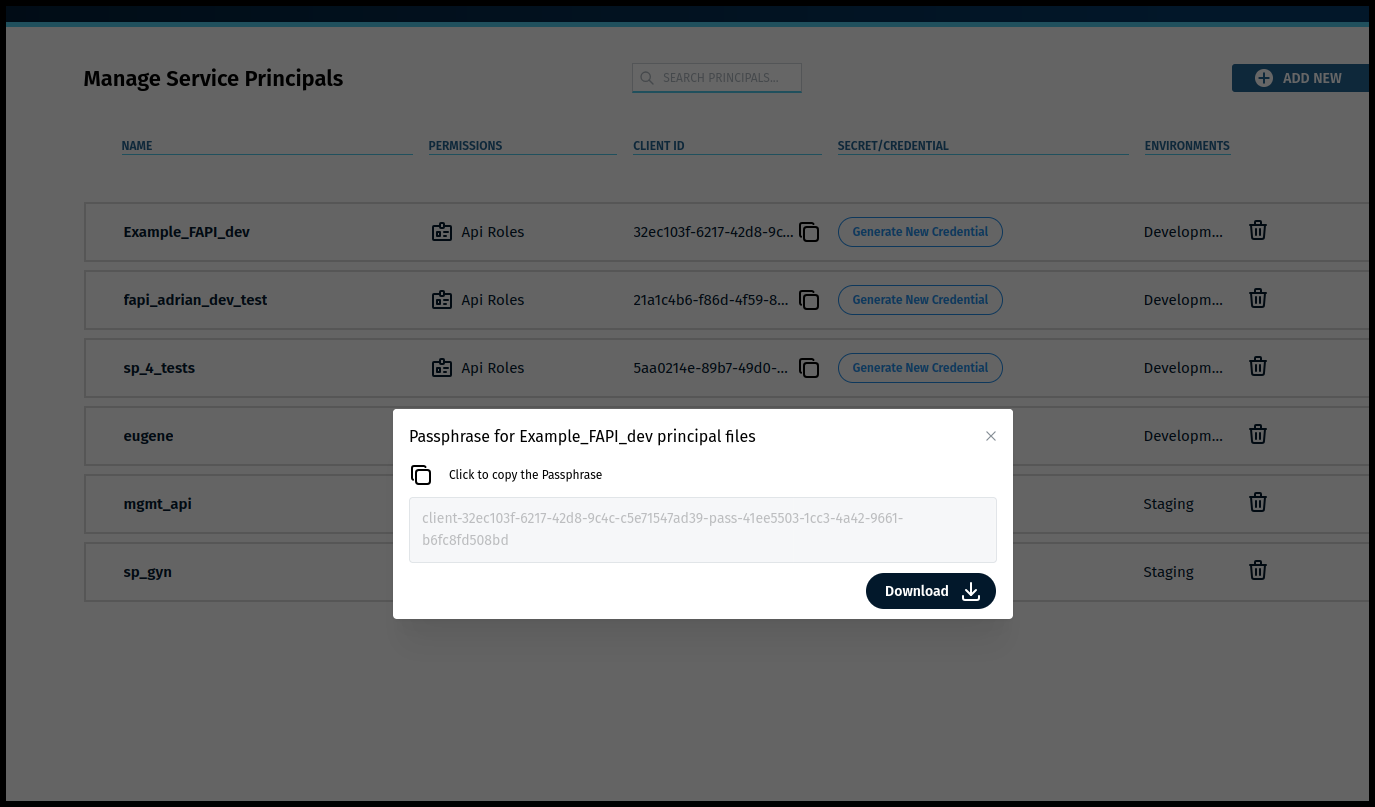
The following results occur:
- The new Principal is added
- The Passphrase for the new Principal is created
- A Client in Keycloak is created
- A certificate in AWS is created
When the new Principal is added (as shown in Figure 80), an encryption cryptography process occurs generating the key and the certificate in the certificate manager.
The Passphrase-Download window opens (as shown in Figure 80).
Important: Copying the Passphrase, and downloading the files, are SEPARATE actions in this same Passphrase-Download window.
DO NOT CLOSE THE Passphrase-Download WINDOW, until you have completed BOTH steps.
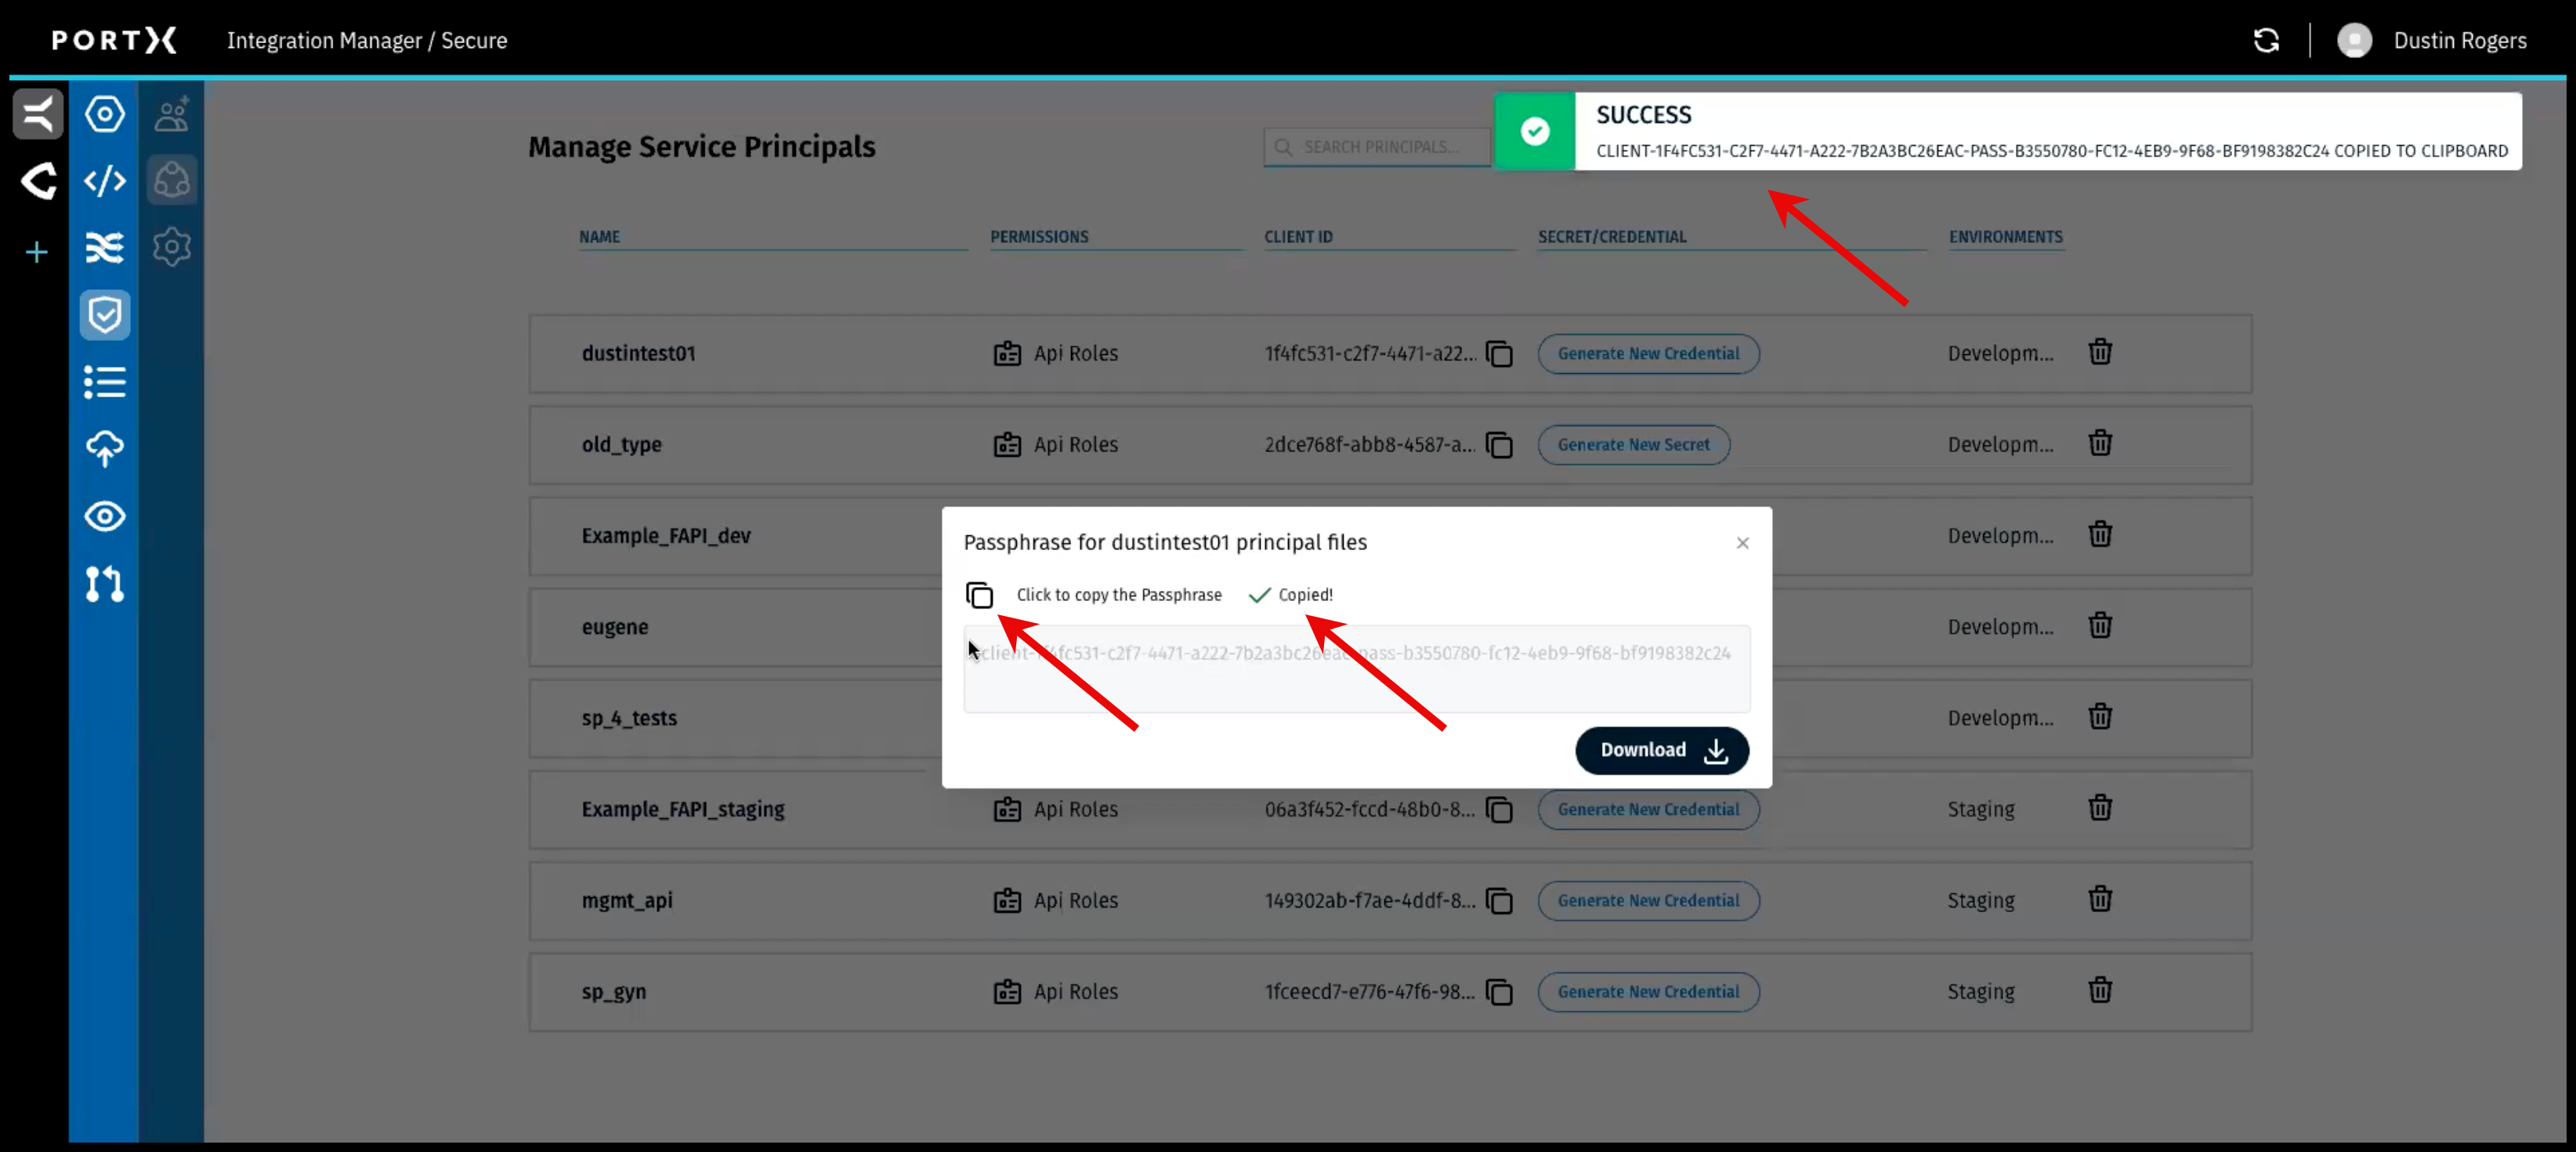
Step 1) In the Passphrase window (as shown in Figure 81 and Figure 82)
- Click on COPY the passphrase (Figure 81 left arrow) and save it to be used later. The passphrase is for the principal files and used to decrypt the key.
DO NOT CLOSE the Passphrase-Download window yet.
When you have successfully copied the passphrase, 2 confirmation messages appear BRIEFLY (for a couple of seconds):
- Checkmark and the word “Copied” next to the Copy function (Figure 81 middle arrow)
- “Success” banner message with a green check mark in the upper right of page (Figure 81 upper right arrow)
DO NOT CLOSE the Passphrase-Download window yet.
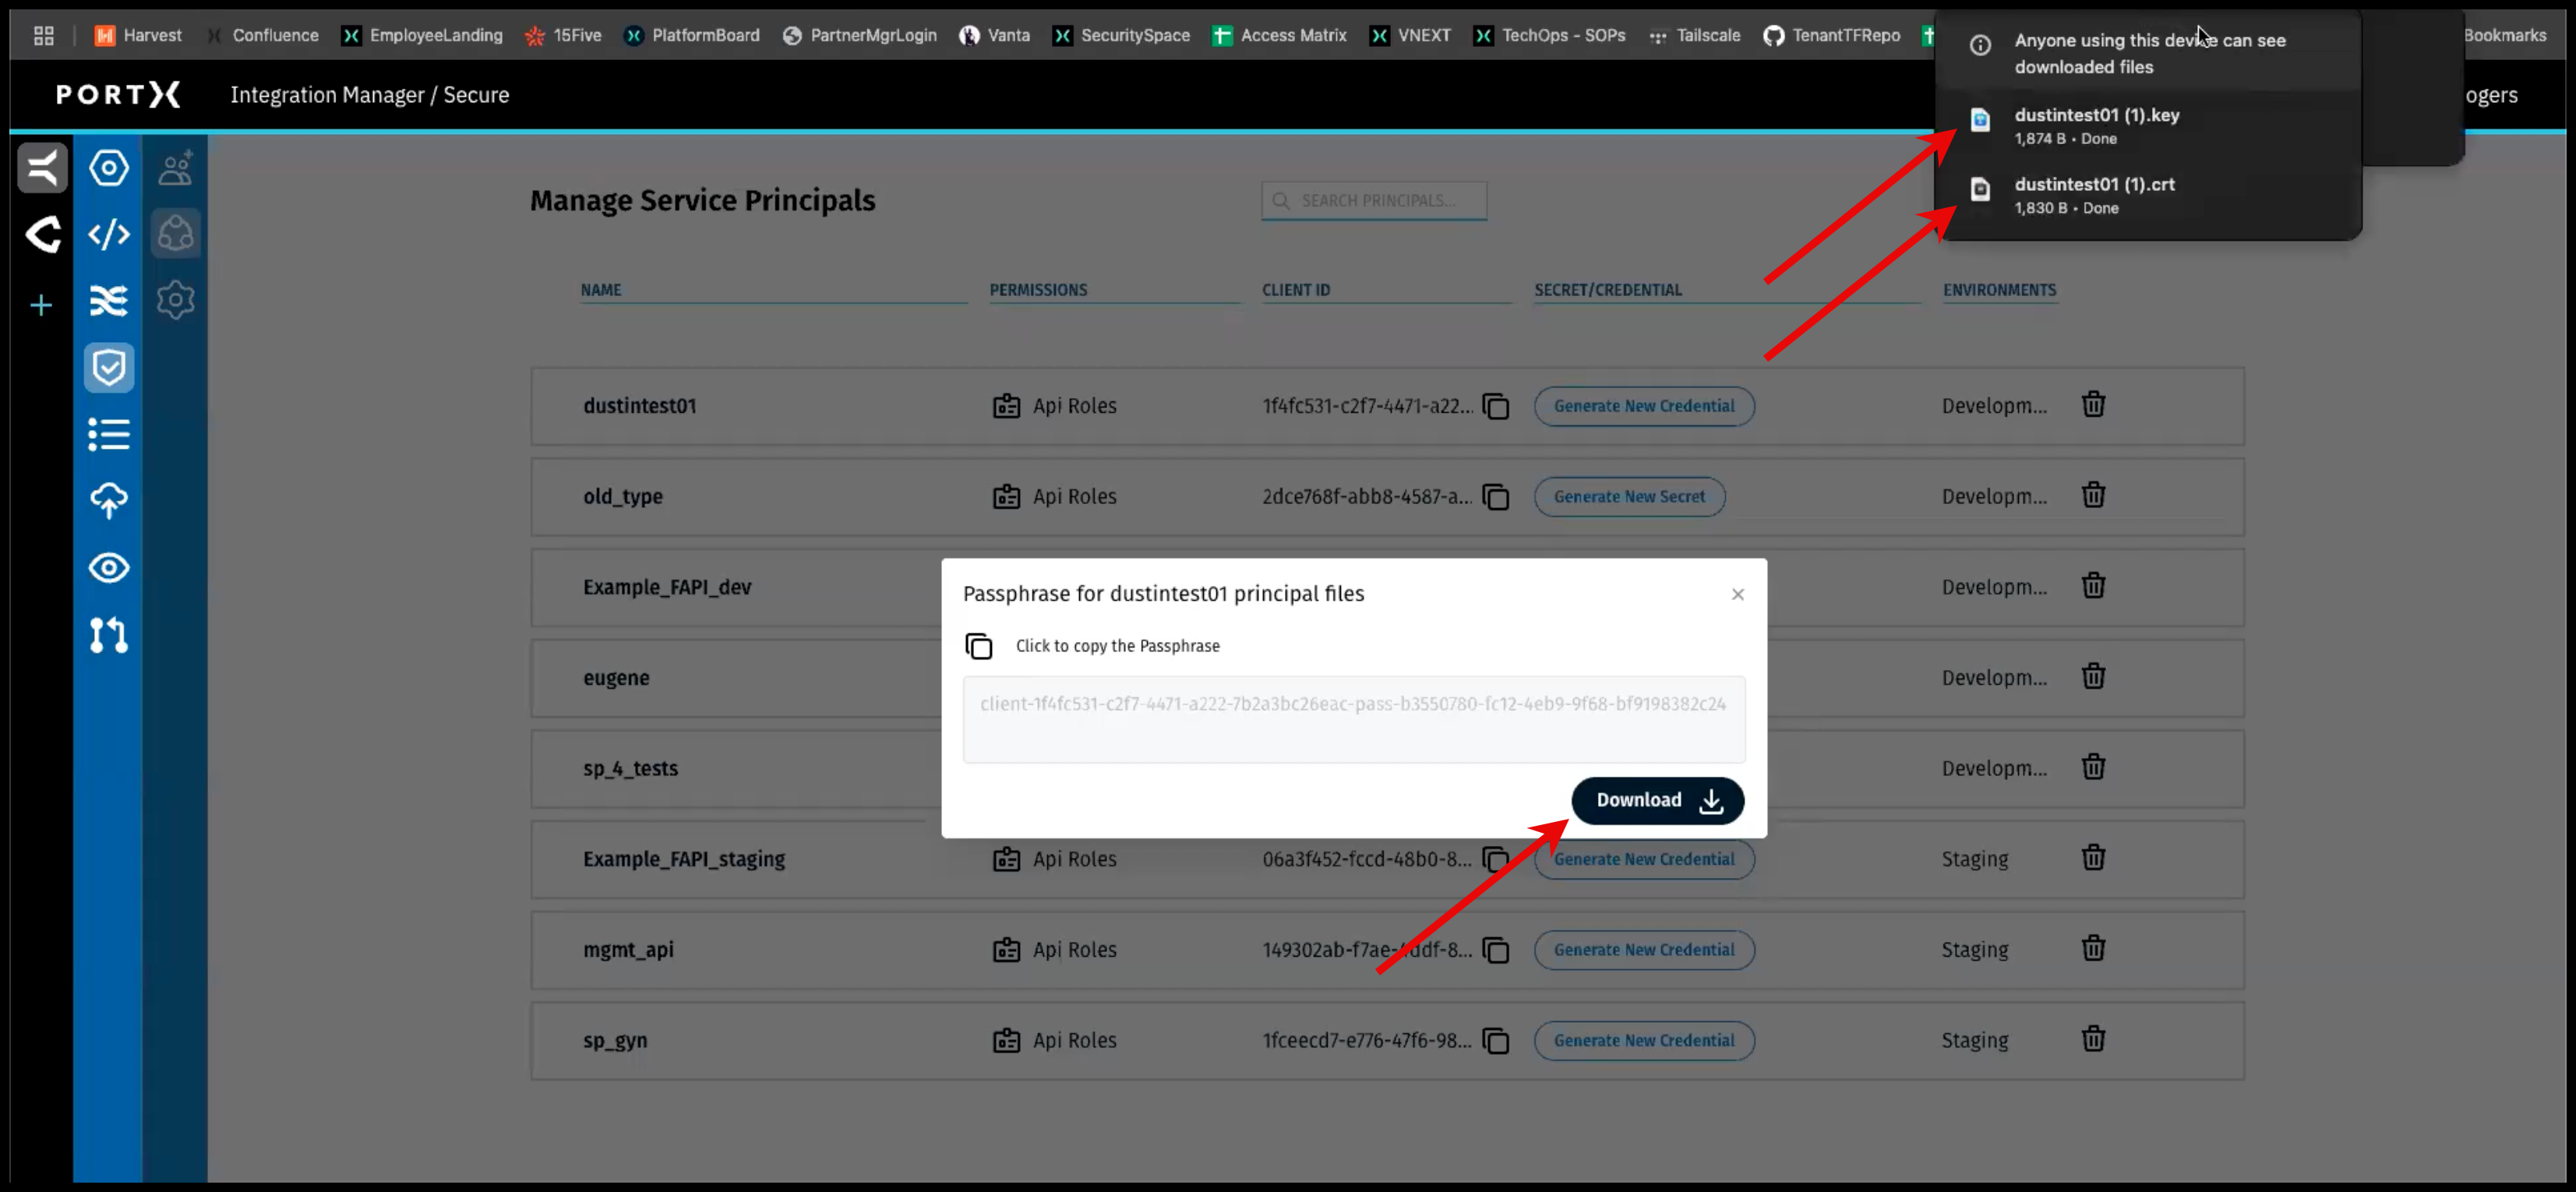
Step 2) In the Passphrase-Download window (as shown in Figure 82), AFTER copying the passphrase:
- Click on the Download button (Figure 82 left lower arrow) and the following files are downloaded:
- The Private Key file (as shown in Figure 82 top right arrow) named after the provided client name and .key extension. The key is encrypted to the passphrase.
- The Certificate file (as shown in Figure 82 2nd right arrow) named after the provided client name and .crt extension. The certificate is already in usable form.
(In Figure 82 the Key file and Certificate file have each been downloaded a 2nd time and therefore show “(1)” after them.)
AFTER you have successfully completed BOTH steps in the Passphrase-Download window:
- Copied the passphrase (Figure 80 and Figure 81)
- Downloaded the files and you see the confirmation (Figure 82 top right arrows)
You may NOW close the Passphrase-Download window.
Part of the implementation of FAPI is that the passphrase is supplied usually through a secret manager. In usage, the key is decrypted and the key is exposed in the form in which it is usable.