Manage Service Principals—Assign API Roles
Manage Service Principals—Assign API Roles—Edit Role
Edit a specific API and change which Role is assigned to it.
![]()
On the Secure Module Main Page which is the Manage API Roles page, click on the Left Navigation Secure Module sub-menu—Principals icon (as shown in Figure 97).
The Secure Module—Manage Service Principals page opens (as shown in Figure 98).

If needed, use the Search or Filter feature at the top of the page to enter part of the name or Client ID number of the API to which you want to ADD an API Role.
![]()
On the specific API, mouseover or hover over Api Roles and the pop-up message appears stating the Role in this example is currently “user,” and has a blue link to “Assign Api Roles” (as shown in Figure 99).
In this example, we are changing the User’s Role from “user” to “admin.”
Click on the link Assign Api Roles.
The Assign Api Roles window opens (as shown in Figure 100).
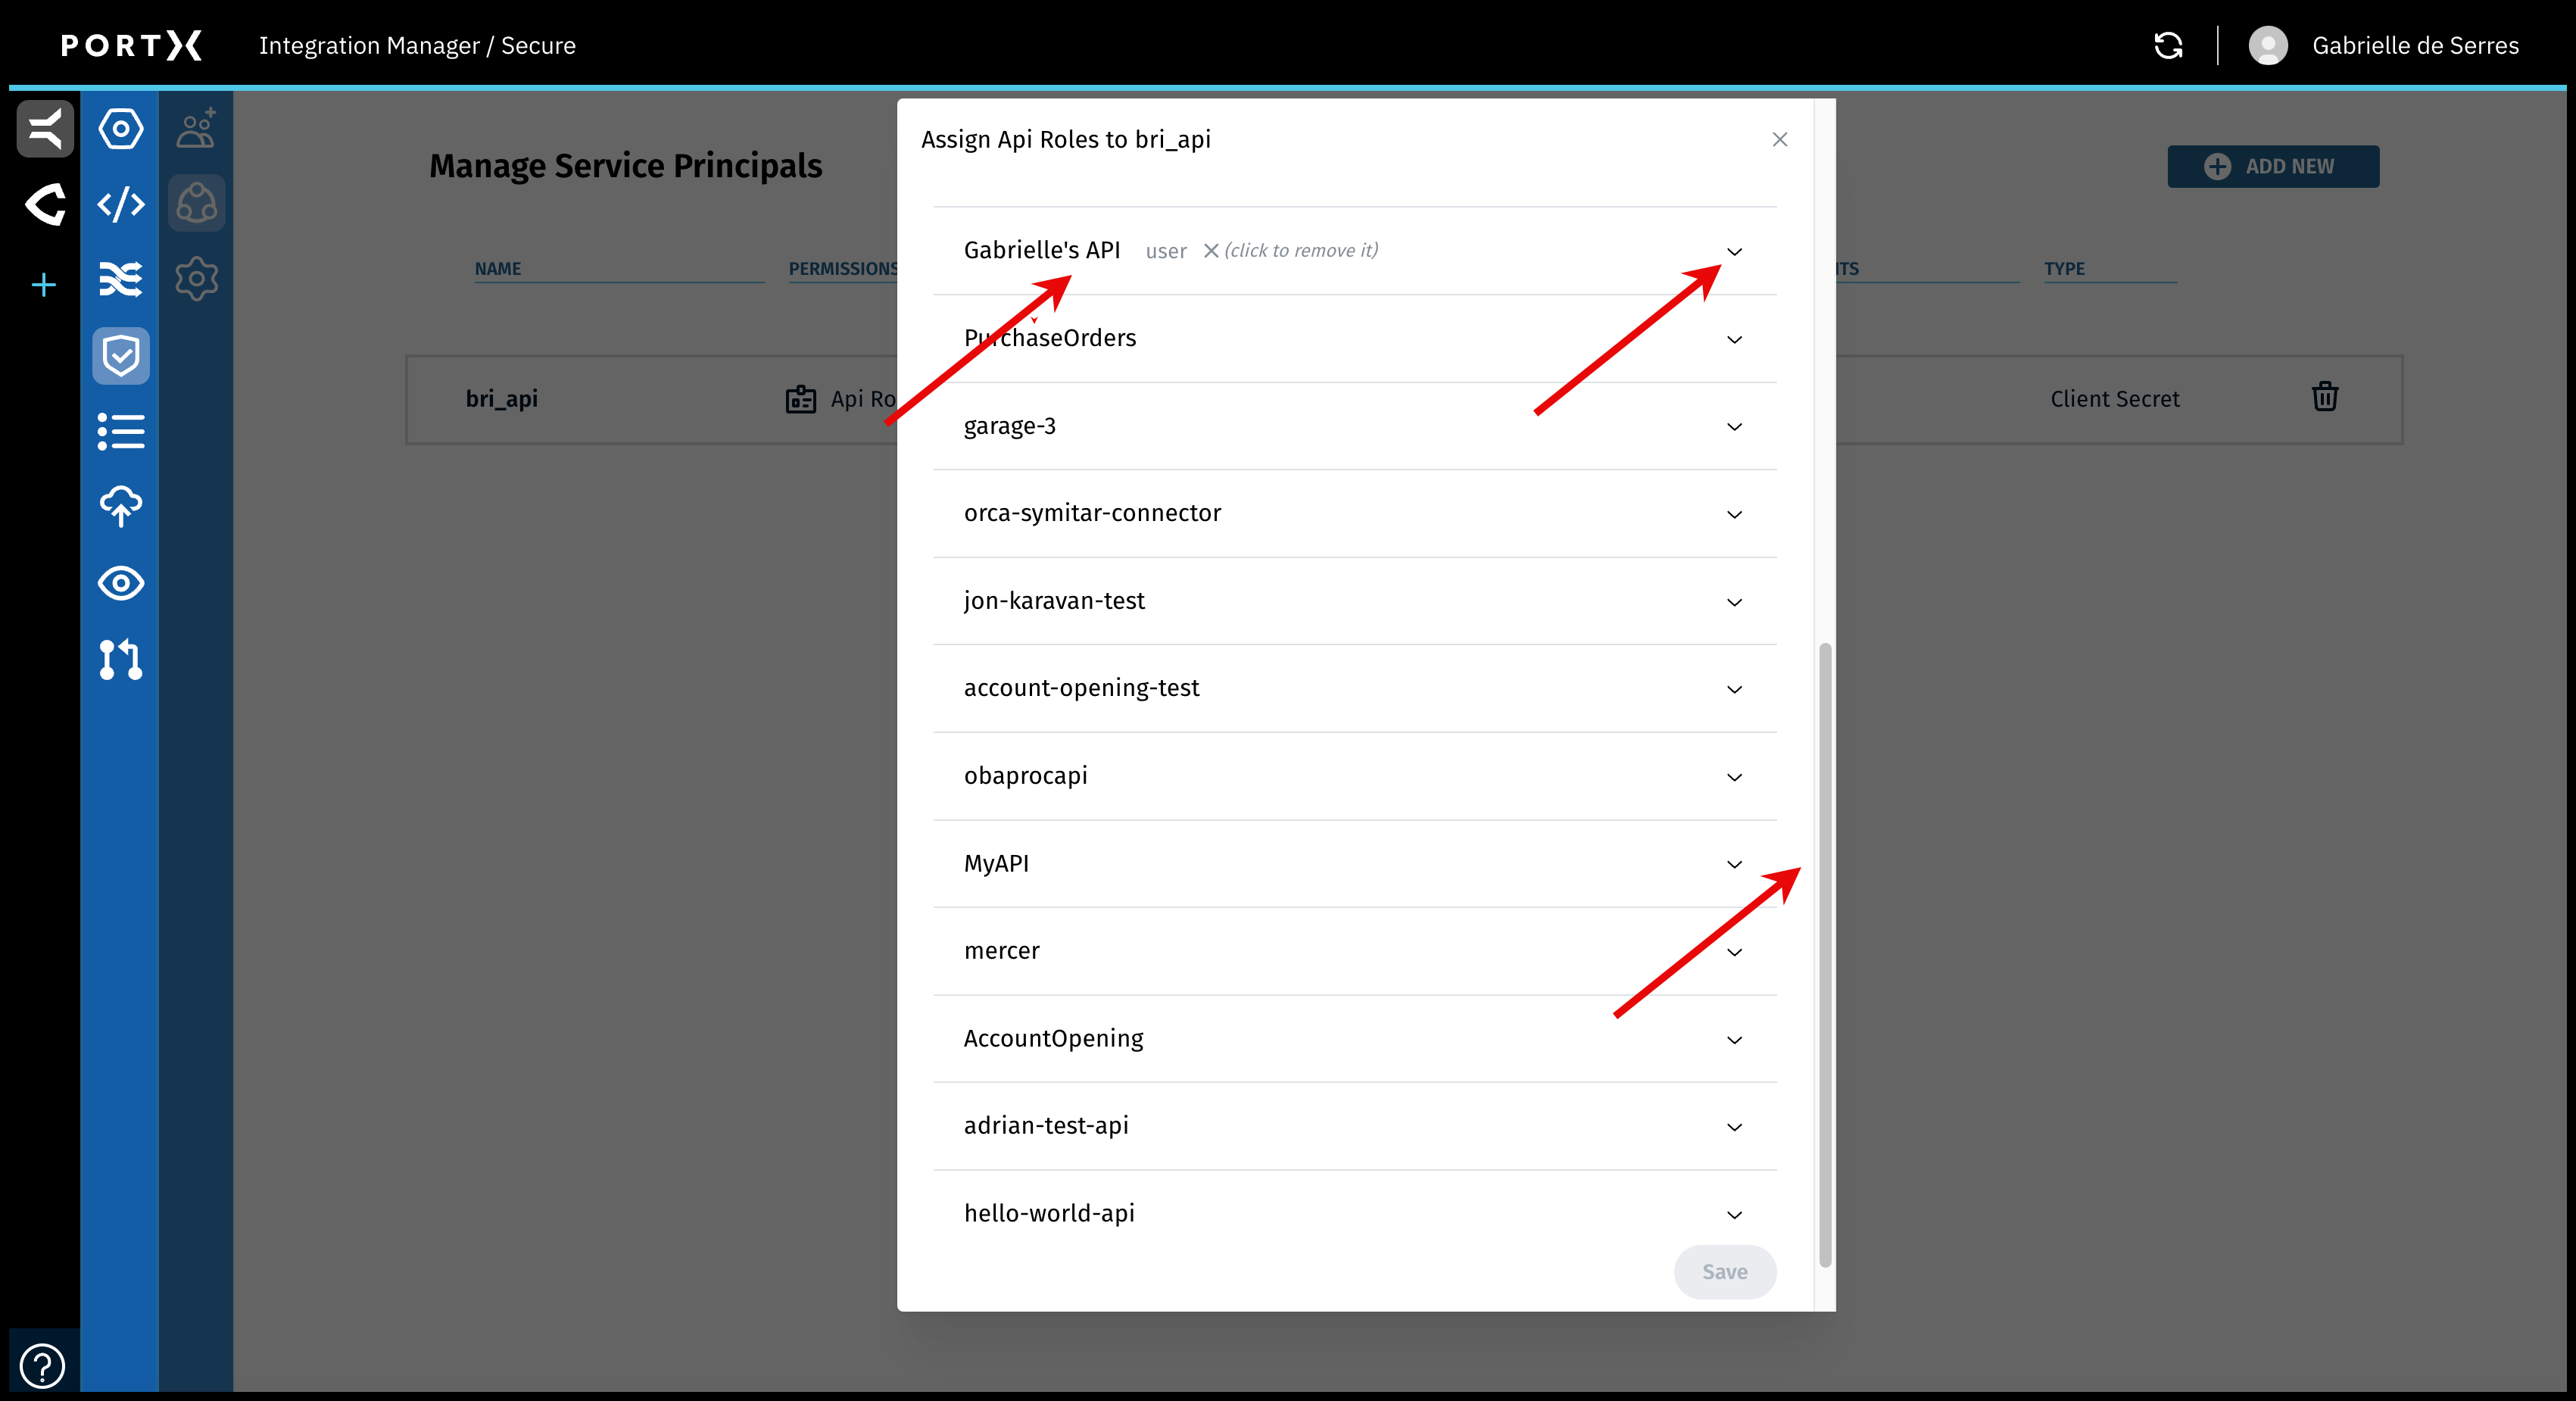
Your organization’s list of APIs may be long and you may need to use the elevator for the window (Figure 100 lower arrow).
When you find the API (in the example in Figure 100, left arrow “Gabrielle’s API”), click on the Chevron (Figure 100 upper right arrow) and the line expands to show the User Roles for this API (as shown in Figure 101).
After you choose a different Role, the Save button becomes selectable (in Figure 100 the Save button is not selectable).
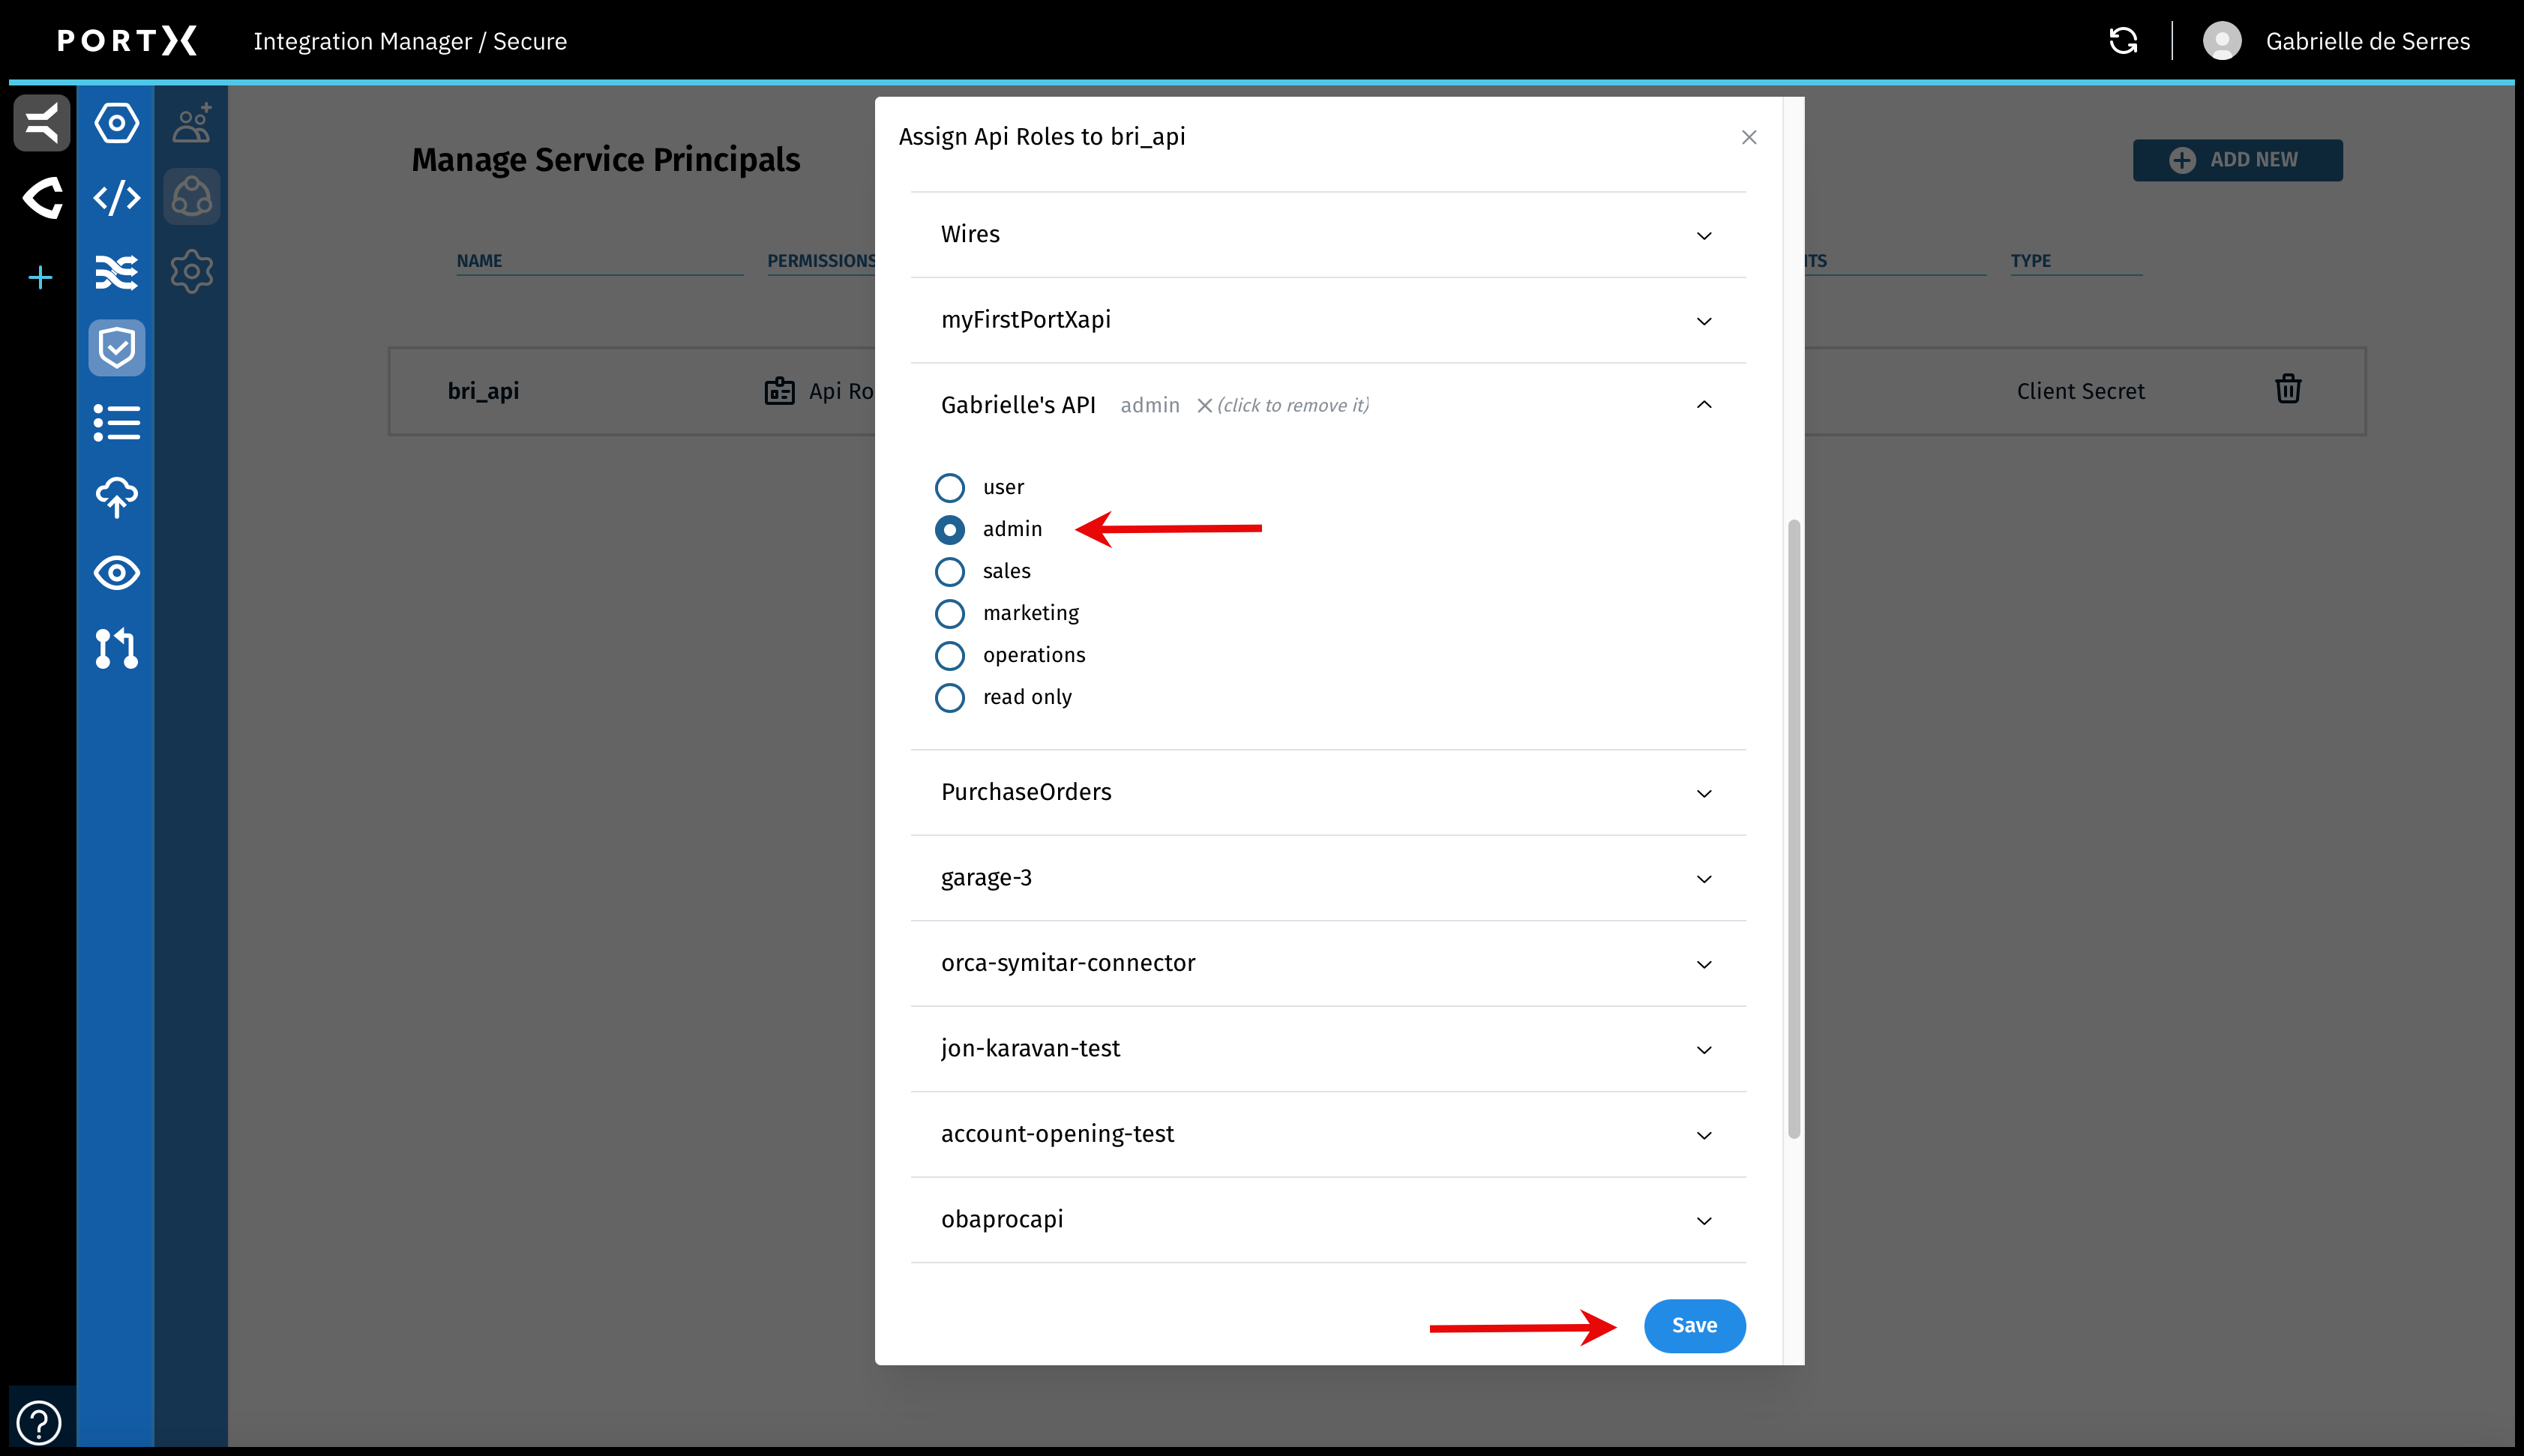
Click on the radio button for a Role (in this example the Role of “admin” is selected as shown in Figure 101 top arrow).
The following responses occur:
- The Role is now listed next to the name of the API
- The Save button becomes selectable (as shown in Figure 101 bottom arrow)
![]()
Click on the Save button.
The Assign Api Roles window closes.
When you have successfully saved the new API Role, a confirmation Success banner message with a green check mark in the upper right of page, appears BRIEFLY (a couple of seconds) as shown in Figure 102.
![]()
On the specific API, mouseover or hover over Api Roles and the pop-up message appears stating the Role currently set is now “admin” (as shown in Figure 103).