Manage Users
Manage Users—Deactivate User
A person cannot deactivate their own User Role.
Depending on your Role and your team member’s Role, you may or may not have access to deactivate your team member's Role.
![]()
On the Secure Module Main Page which is the Manage API Roles page, click on the Left Navigation Secure Module sub-menu—Users icon (as shown in Figure 34).
The Secure Module—Manage Users page opens (as shown in Figure 35).
![]()
To Deactivate a User, open the details page of the User’s record, by clicking on the User’s name (as shown in Figure 35, the team members' names are blurred in this screen capture).
The User’s Record opens (as shown in Figure 36).
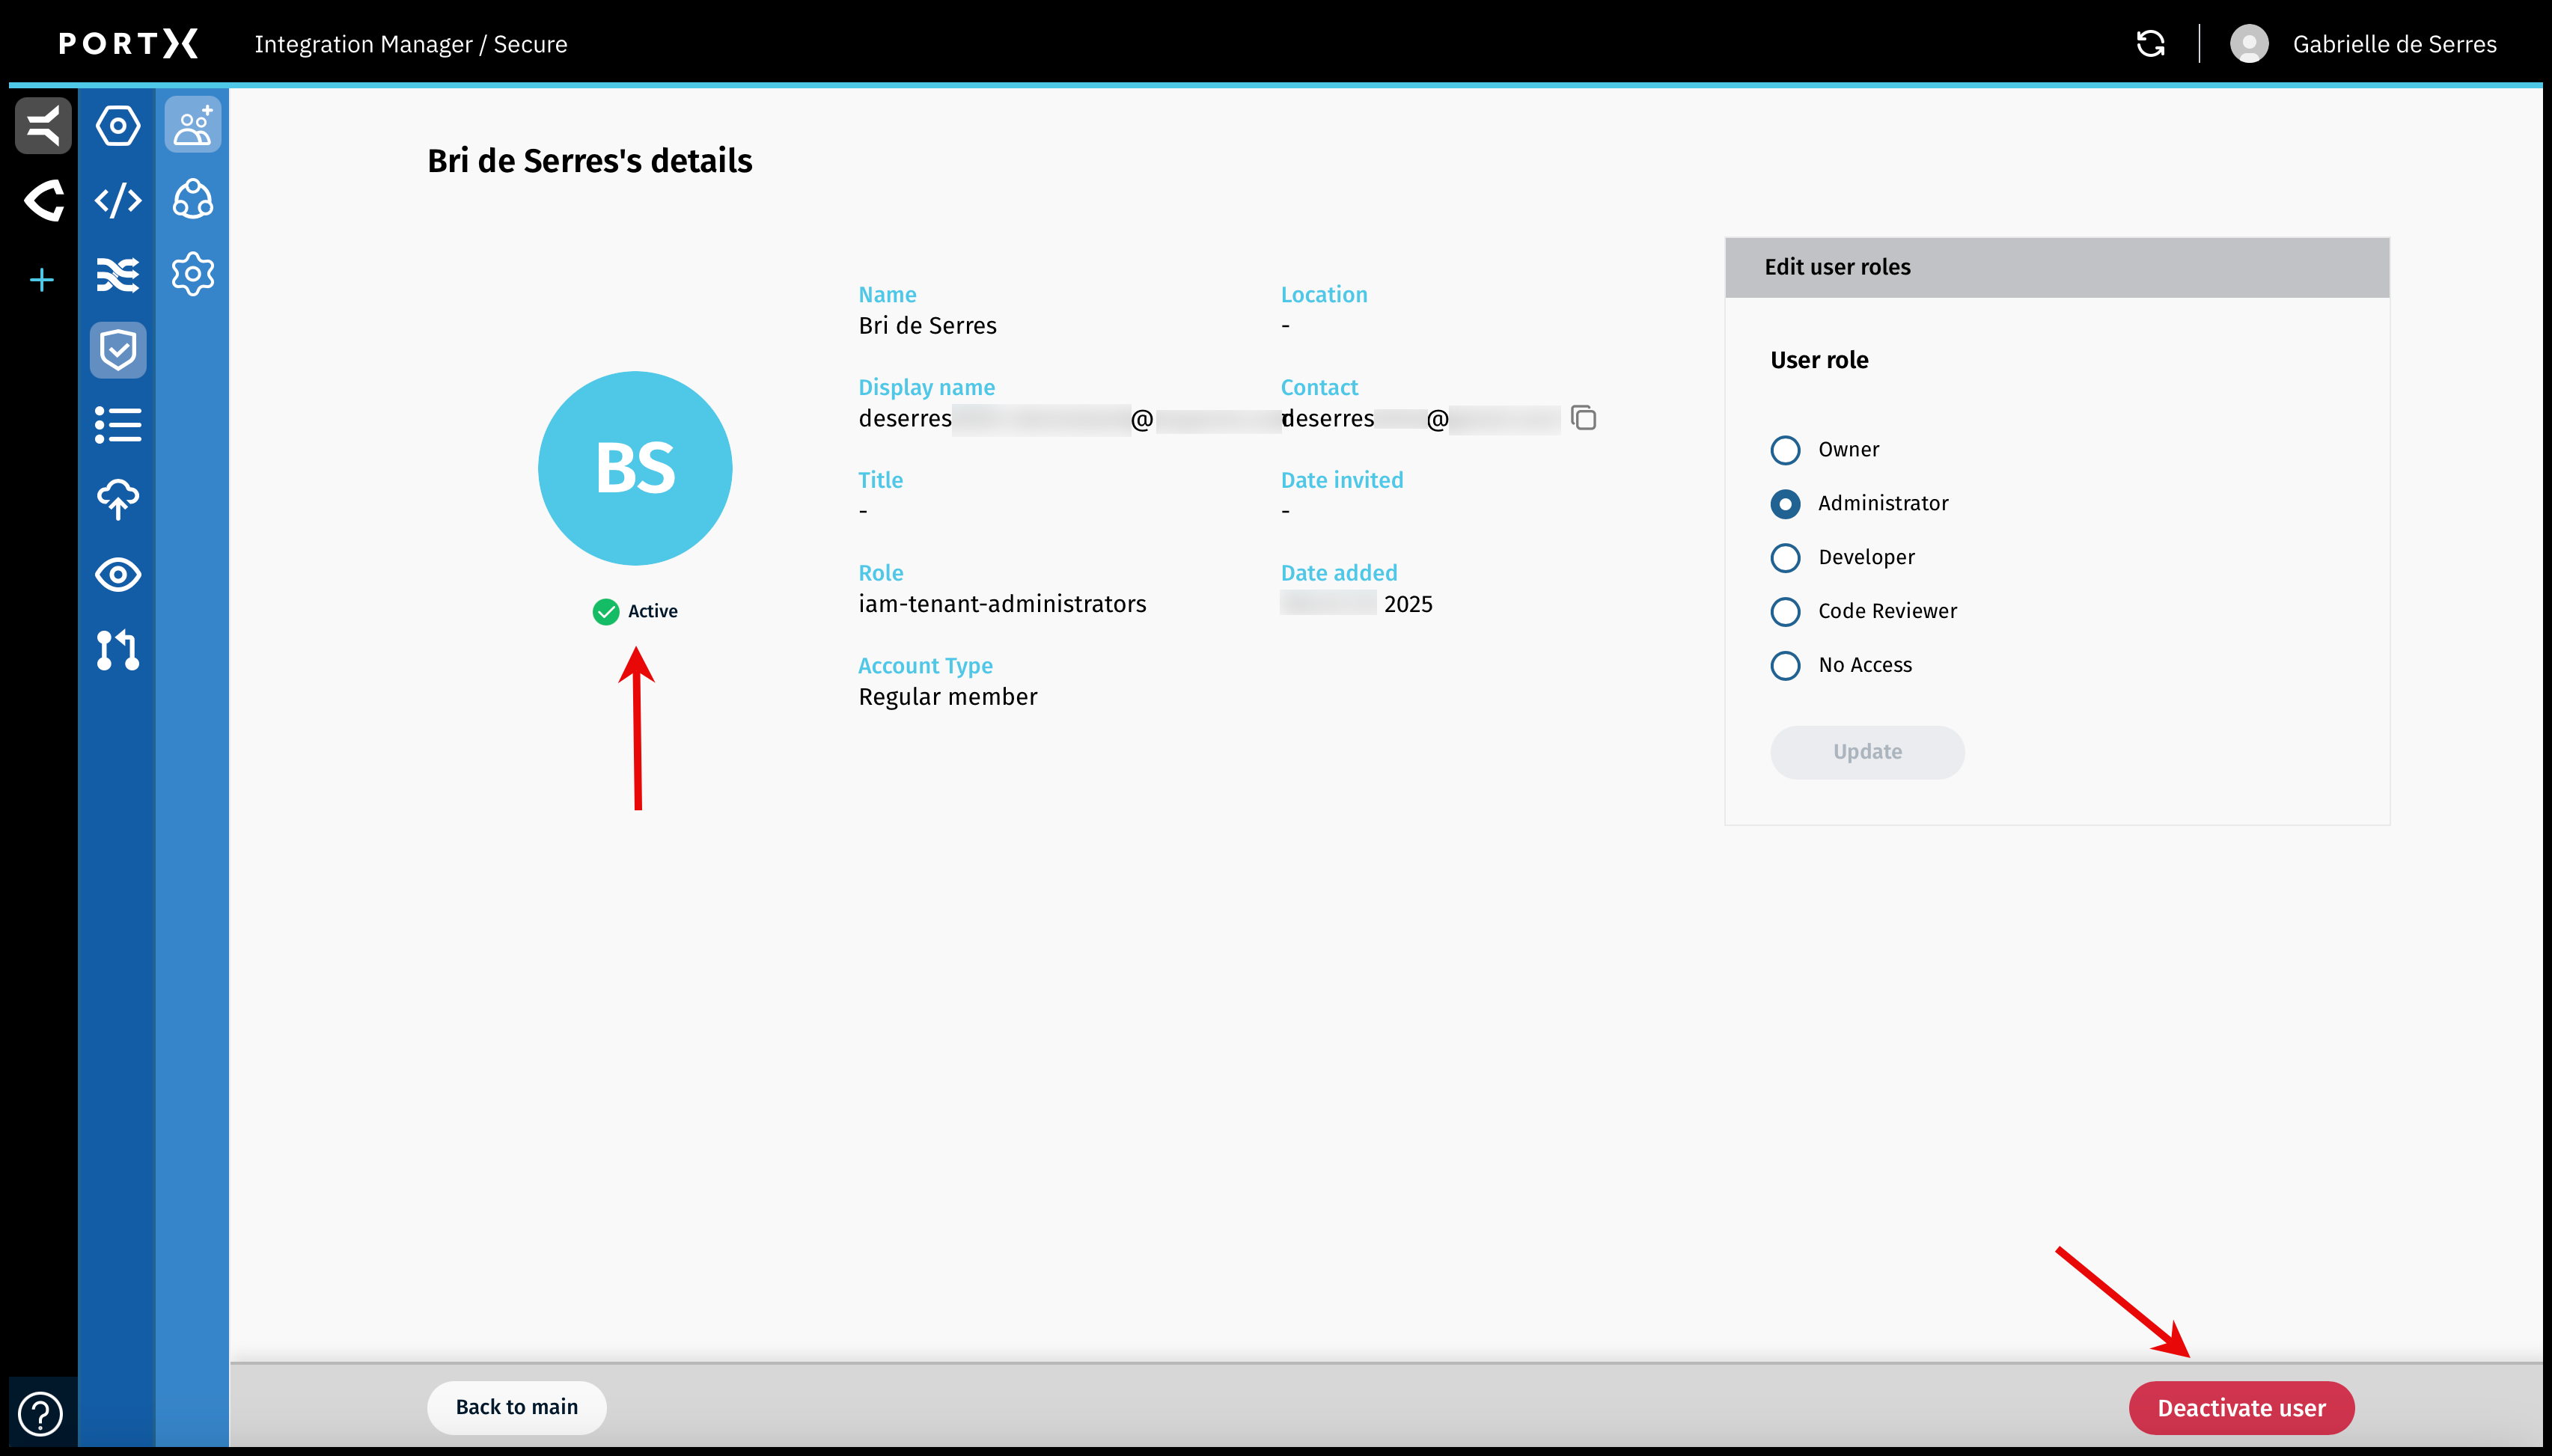
The User shows as “Active” (as shown in Figure 36 left arrow).
Click on the Deactivate User button that turns red when you hover over it (as shown in Figure 36, right arrow).
The Disable User Confirmation window appears (as shown in Figure 37).
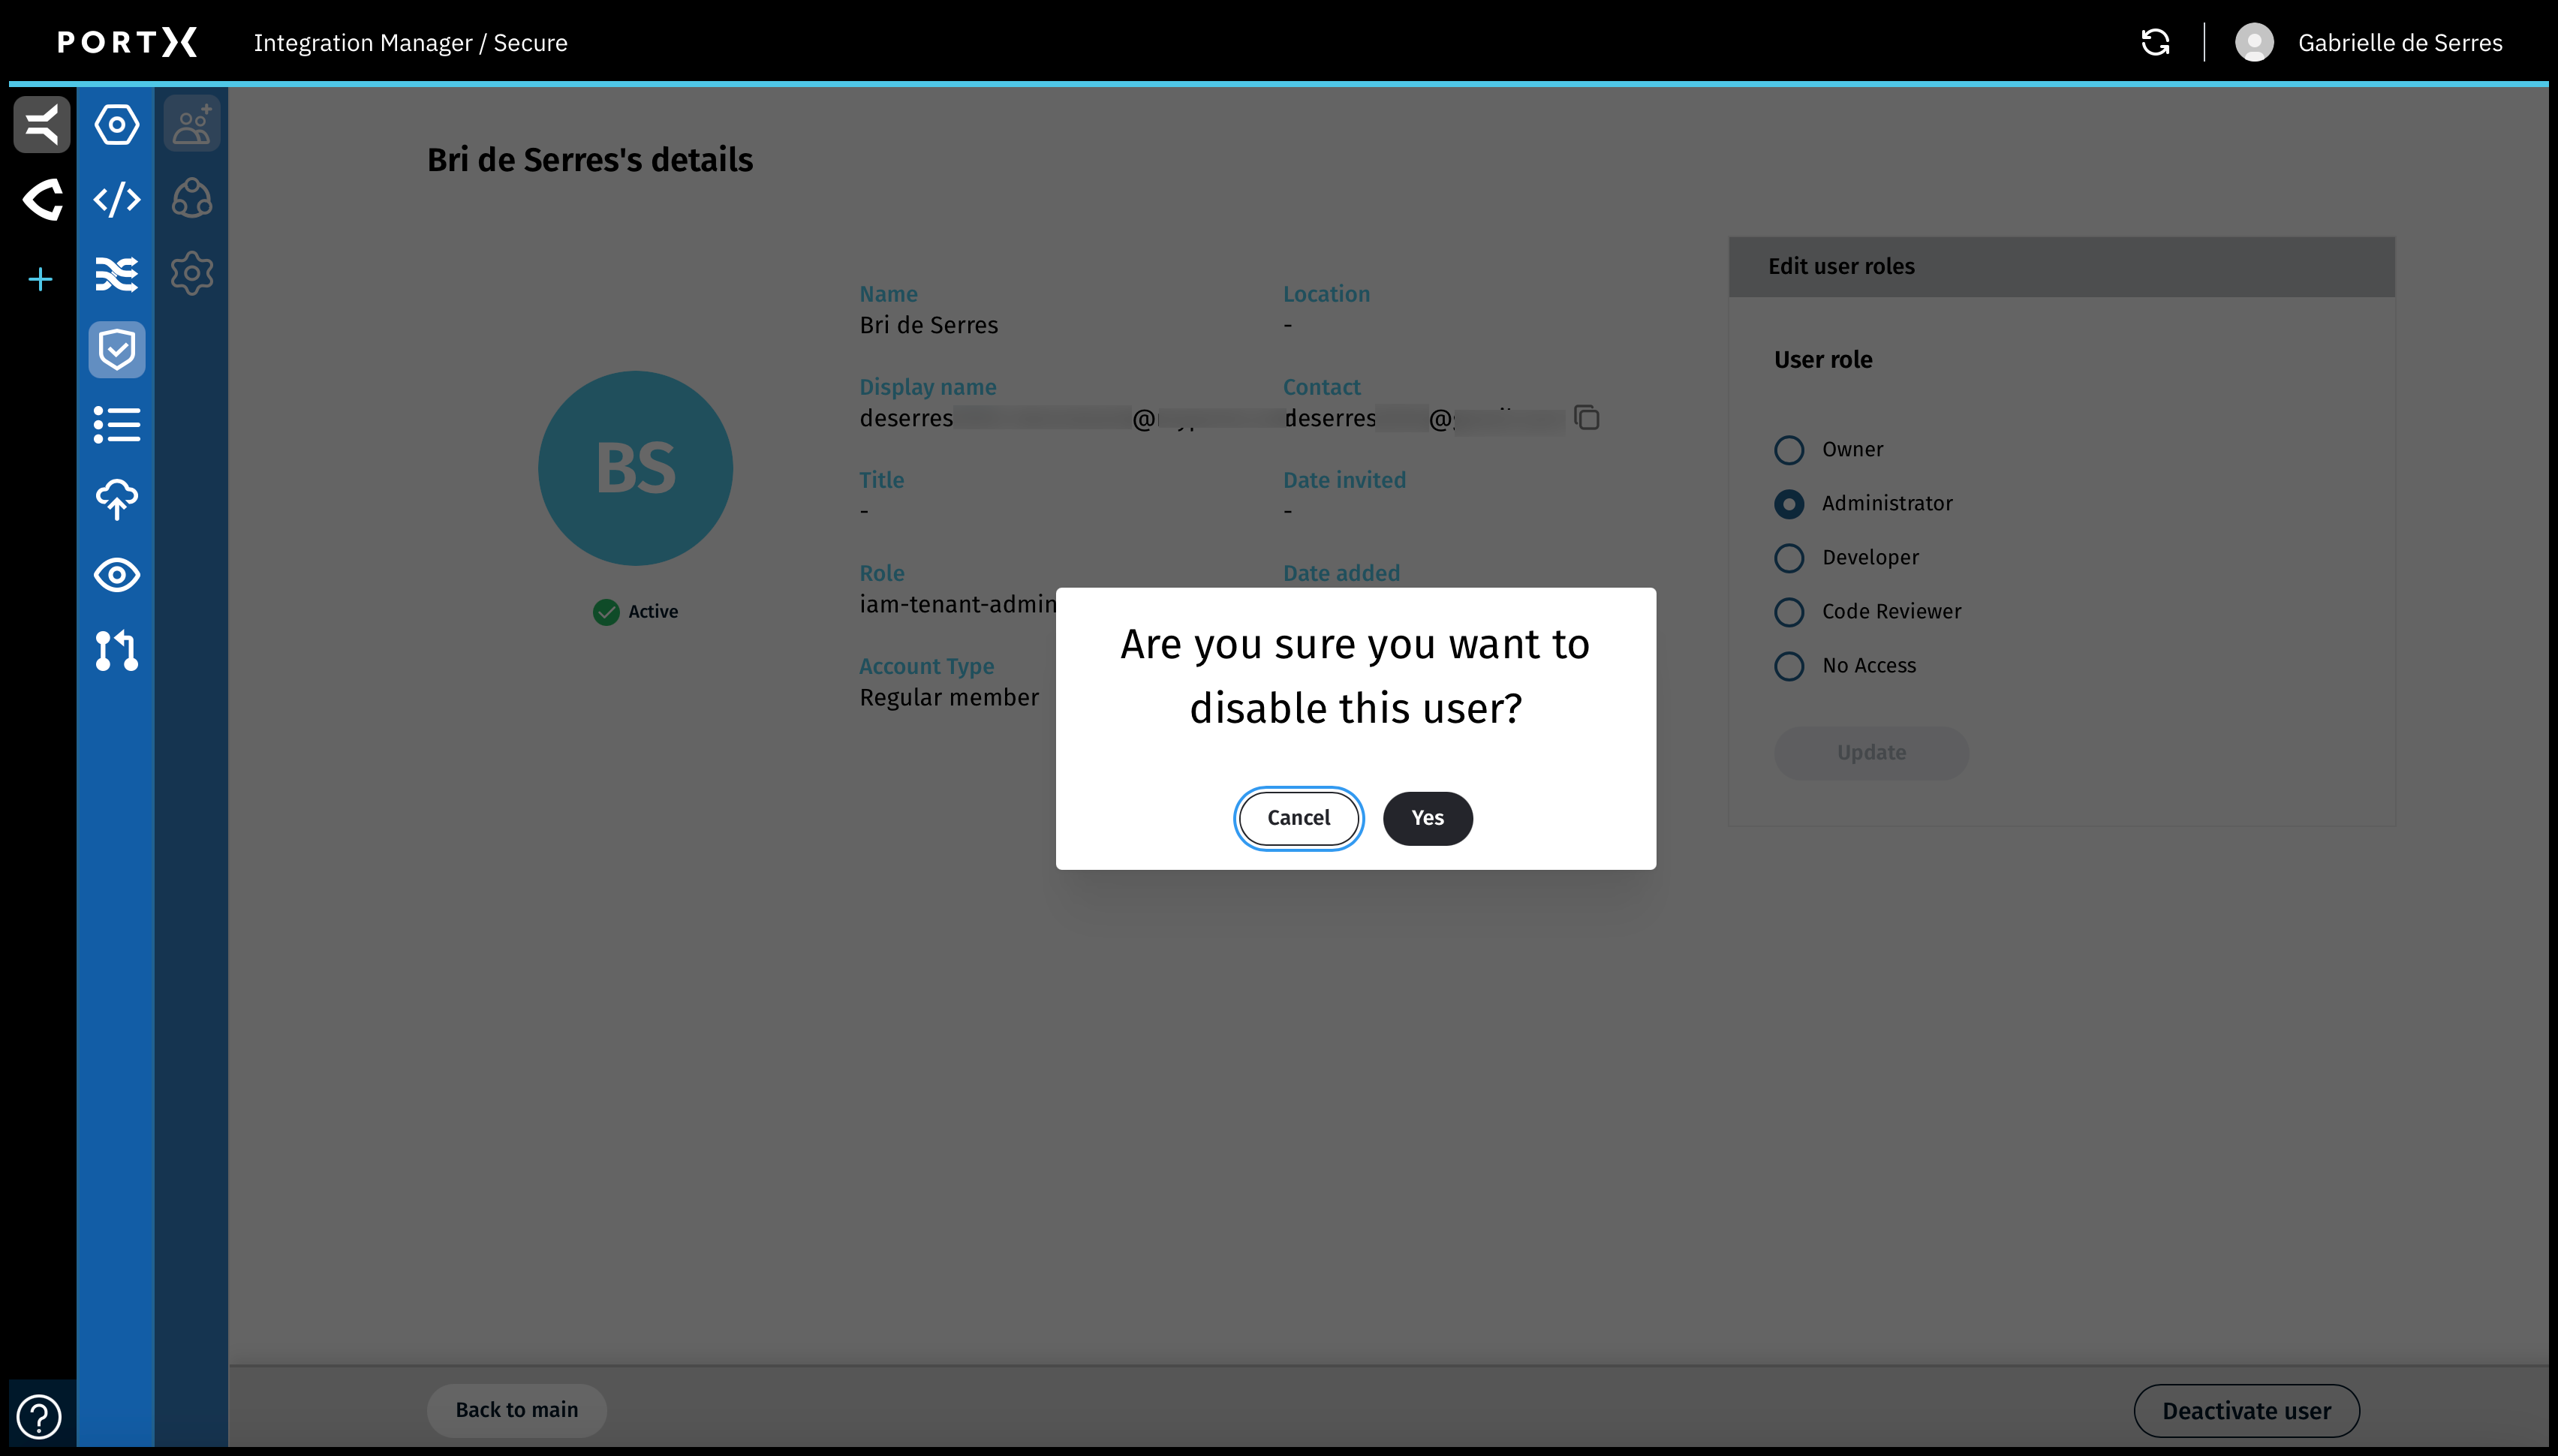
In the Disable User Confirmation window, click on “Yes.”
The Disable User Confirmation window closes.
![]()
A confirmation Success banner message with a green check mark in the upper right of page appears BRIEFLY (a couple of seconds) as shown in Figure 38.
Note: On the page right after the User is deactivated, for the moment the page still shows the User as Active and the button in the lower right still states “Deactivate User.”
After a refresh, the User Record appears (as shown in Figure 42).
Note: Refresh the Manage Users Page to see the User as deactivated (as shown in Figure 41). Until the page is refreshed, the page still appears (as shown in Figure 35).
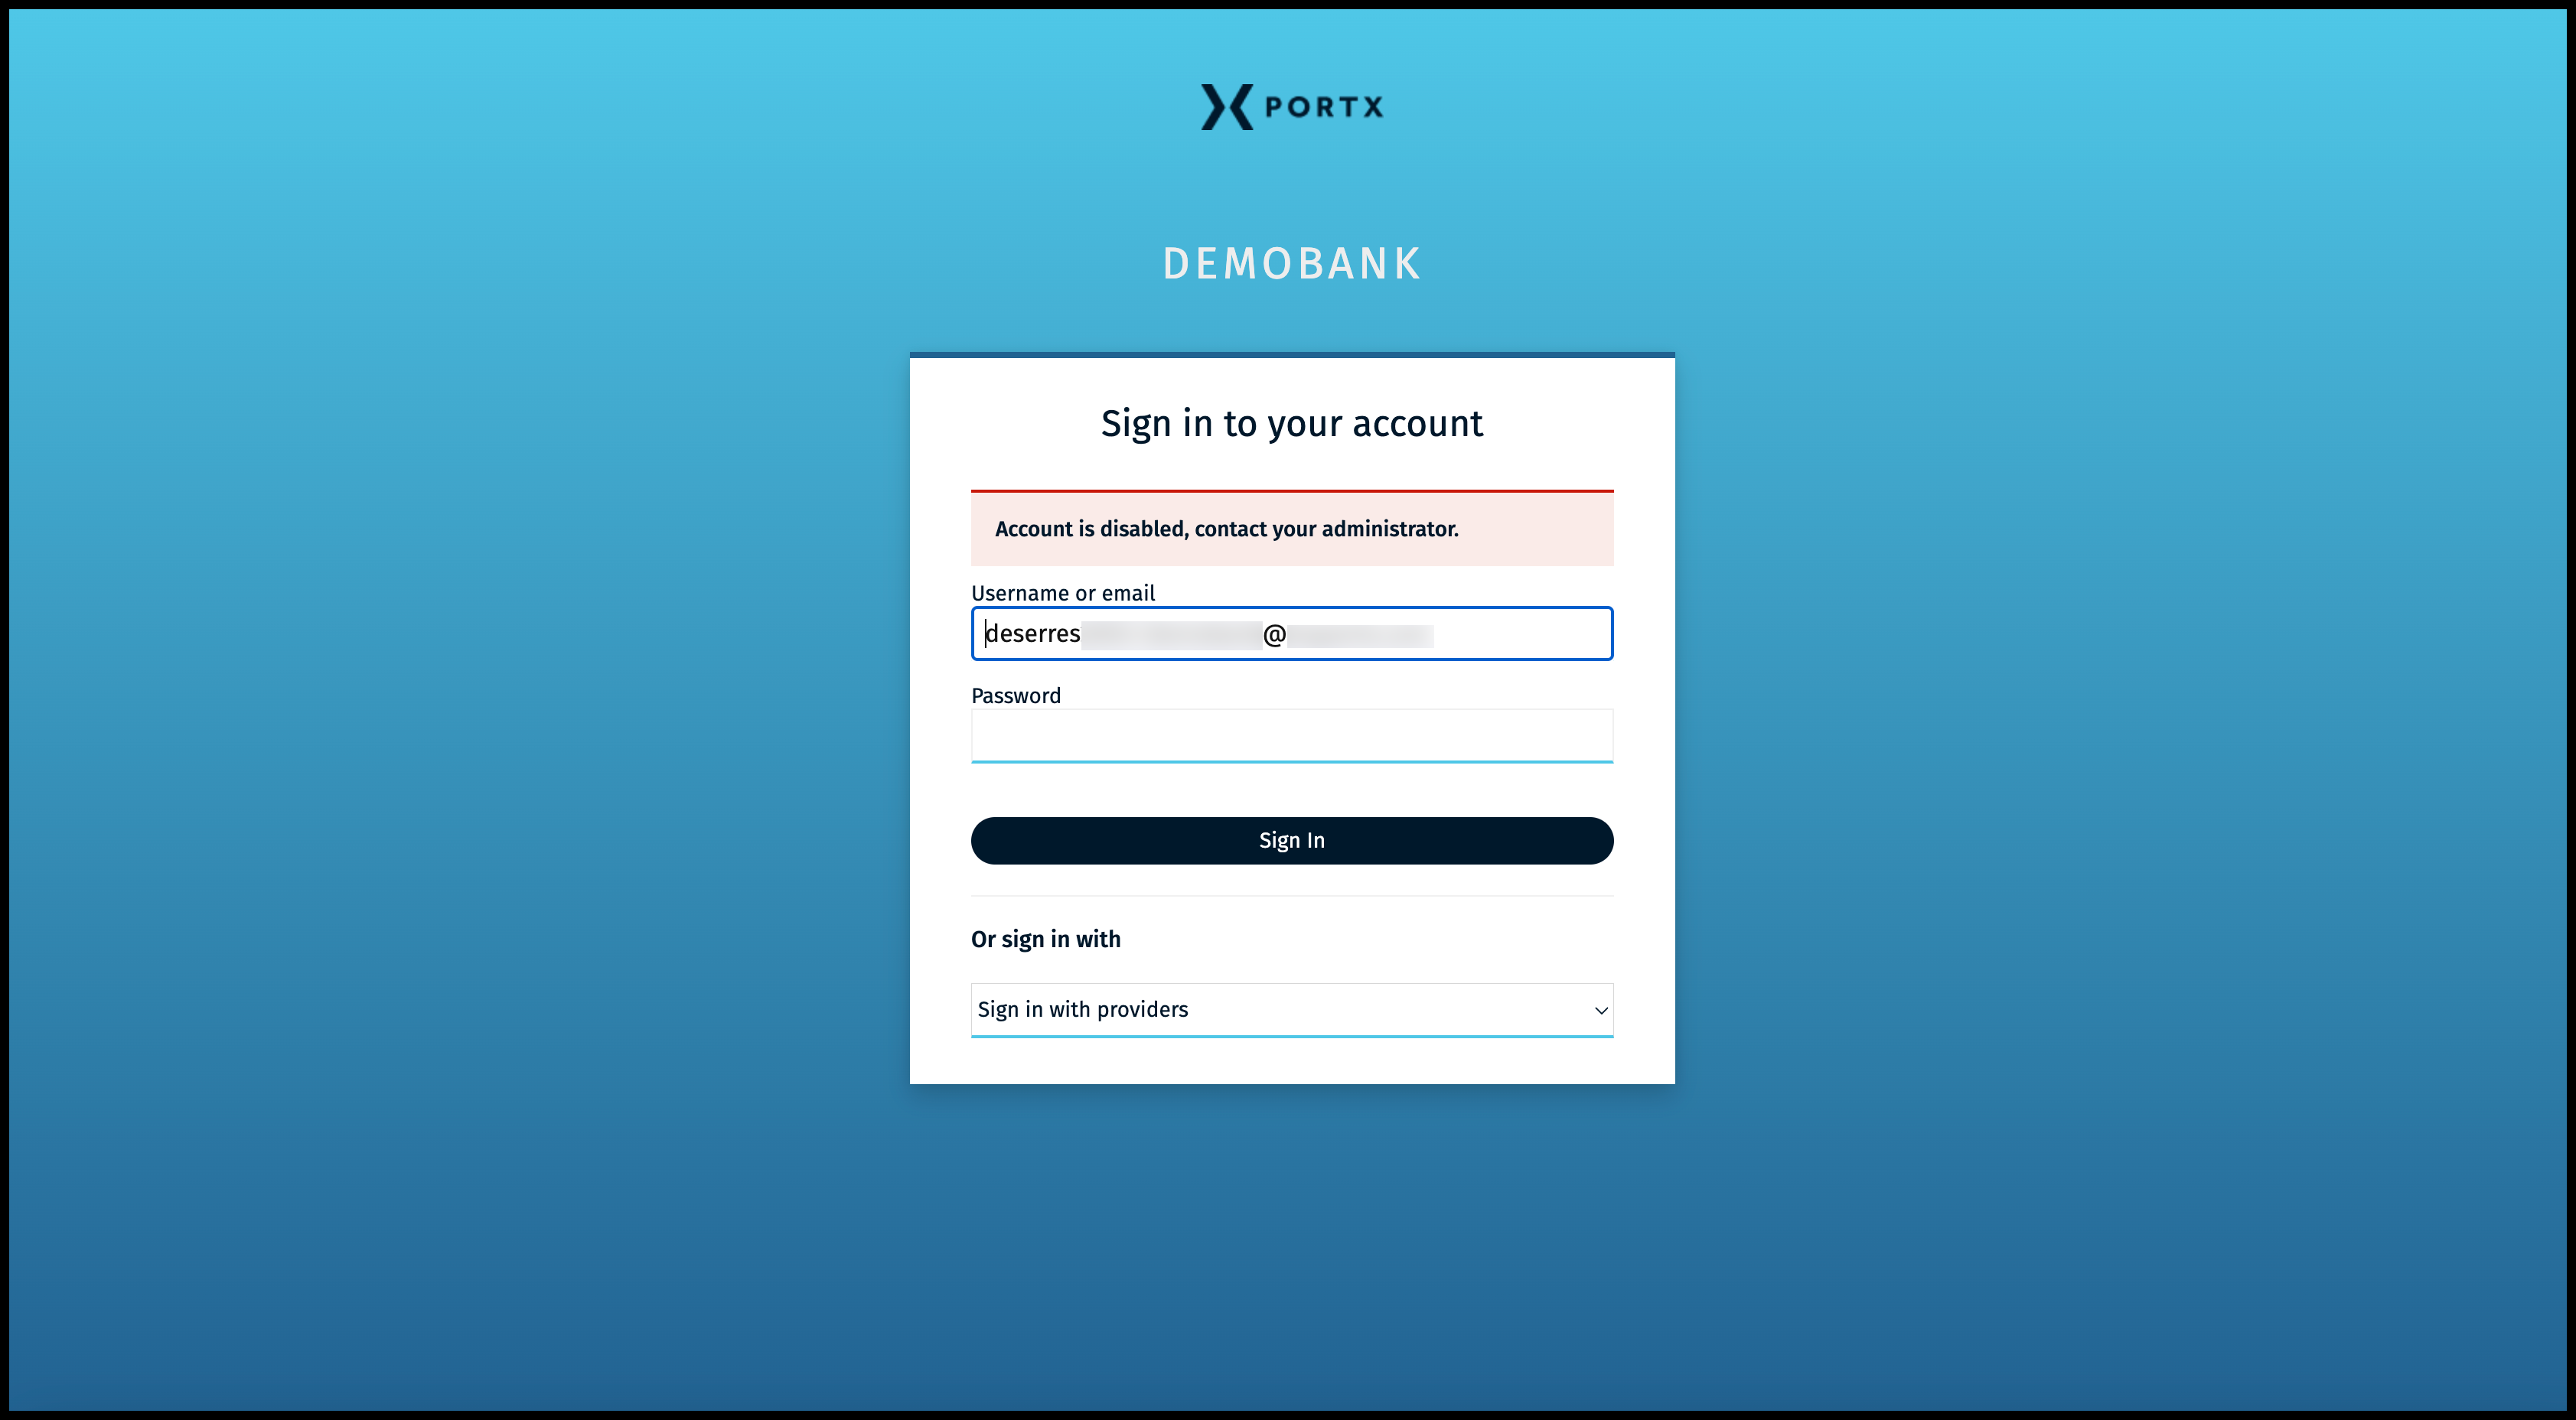
Deactivated User Attempts to Log In to Their Deactivated Account
Figure 39 shows the message and what the User sees when they try to log in to their Deactivated account.