Manage API Roles
Manage API Roles—Edit (Change) API Roles—Add API Roles to a Specific API
You can ADD (assign) API Roles to a specific individual API. Other APIs are not affected.
The Role can be added or assigned to an existing or newly created API. Each principal can be associated with multiple APIs, each with at least one Role assigned to it.
Add an API Role to an API, by performing the following steps:
- Create the name of the Role
- Add it to the list of Roles for that API
- Update the list of API Roles—required step. Without this step the Role does not get added to the API itself.
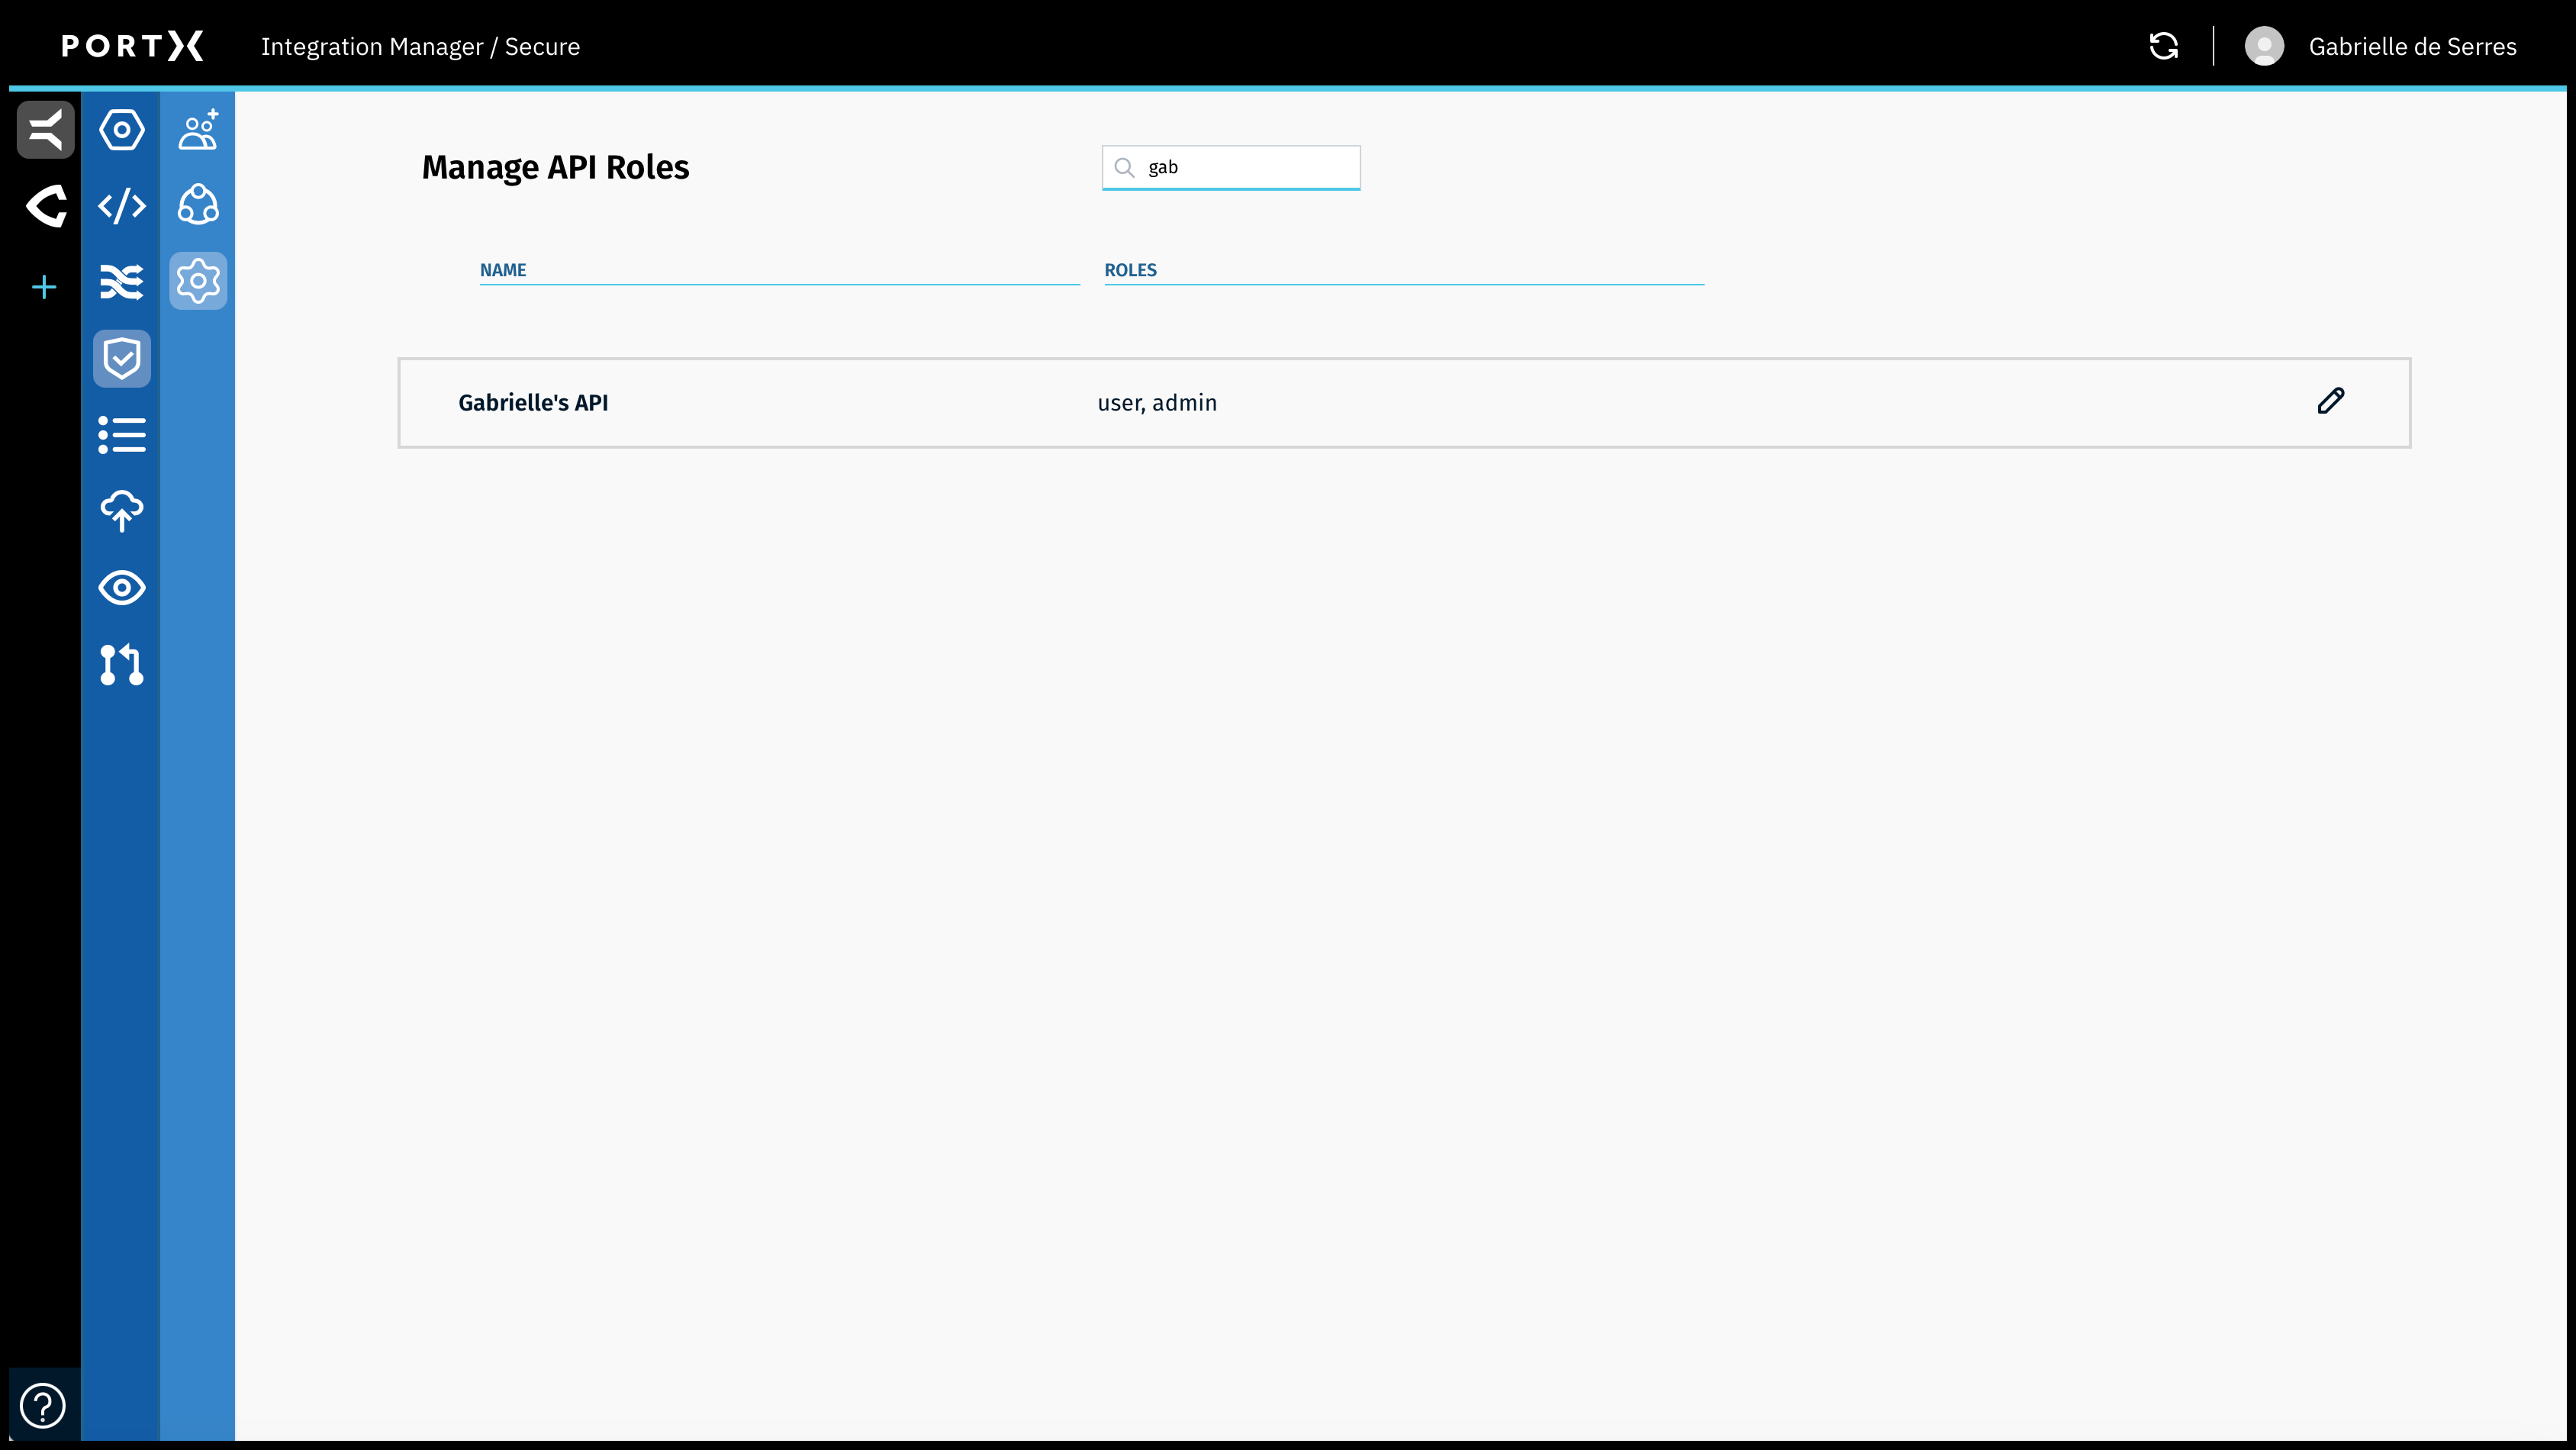
Click anywhere in the box of the API to open the Edit Role window for this API (Figure 52).
The Edit Role window opens (as shown in Figure 53, the name of the API is “Gabrielle’s API”).

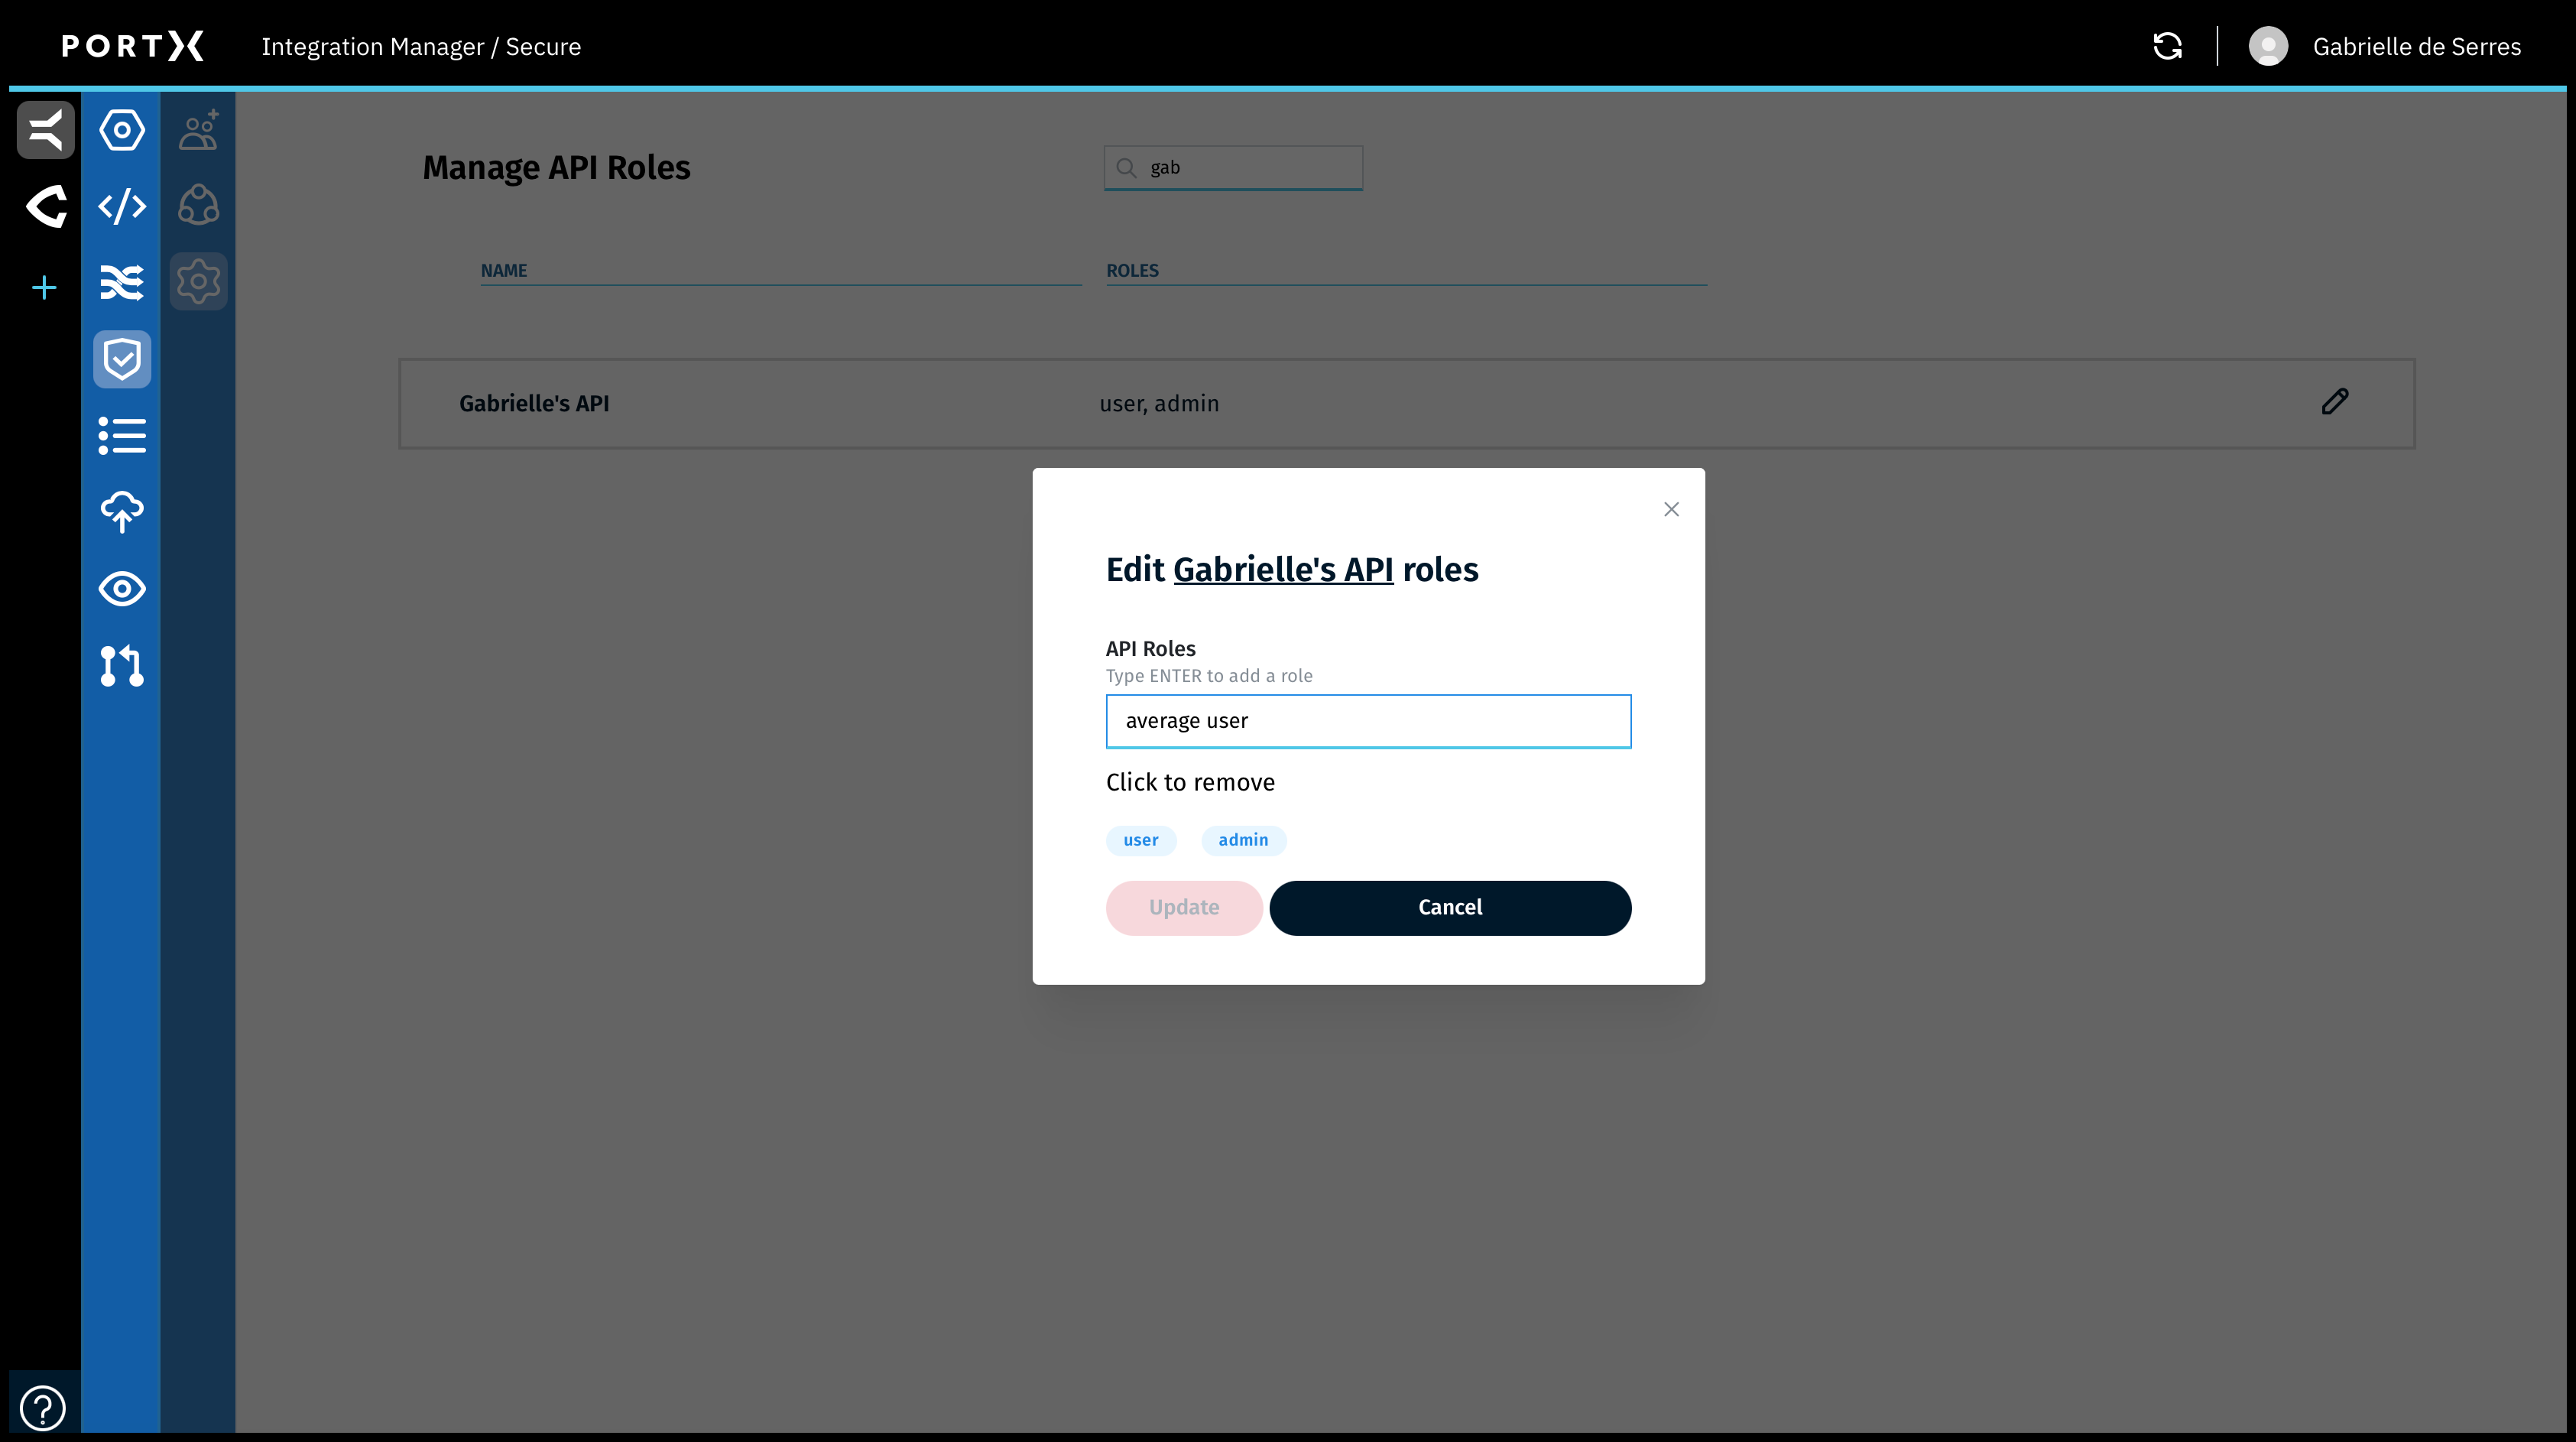
Figure 54 shows the Role named “average user” being added to this API.
- Enter the name of API Role (as shown in Figure 54).
Observe the Update button is not selectable at this time.
- Press the Enter key on your keyboard to add that Role to the list of Roles for that API.
The Role is now added to the list, but is not yet added to the API itself. The addition is pending.
If you leave the page, the Role drops off the list and you would need to start again. Clicking on Cancel also causes the Role to be removed from the list.
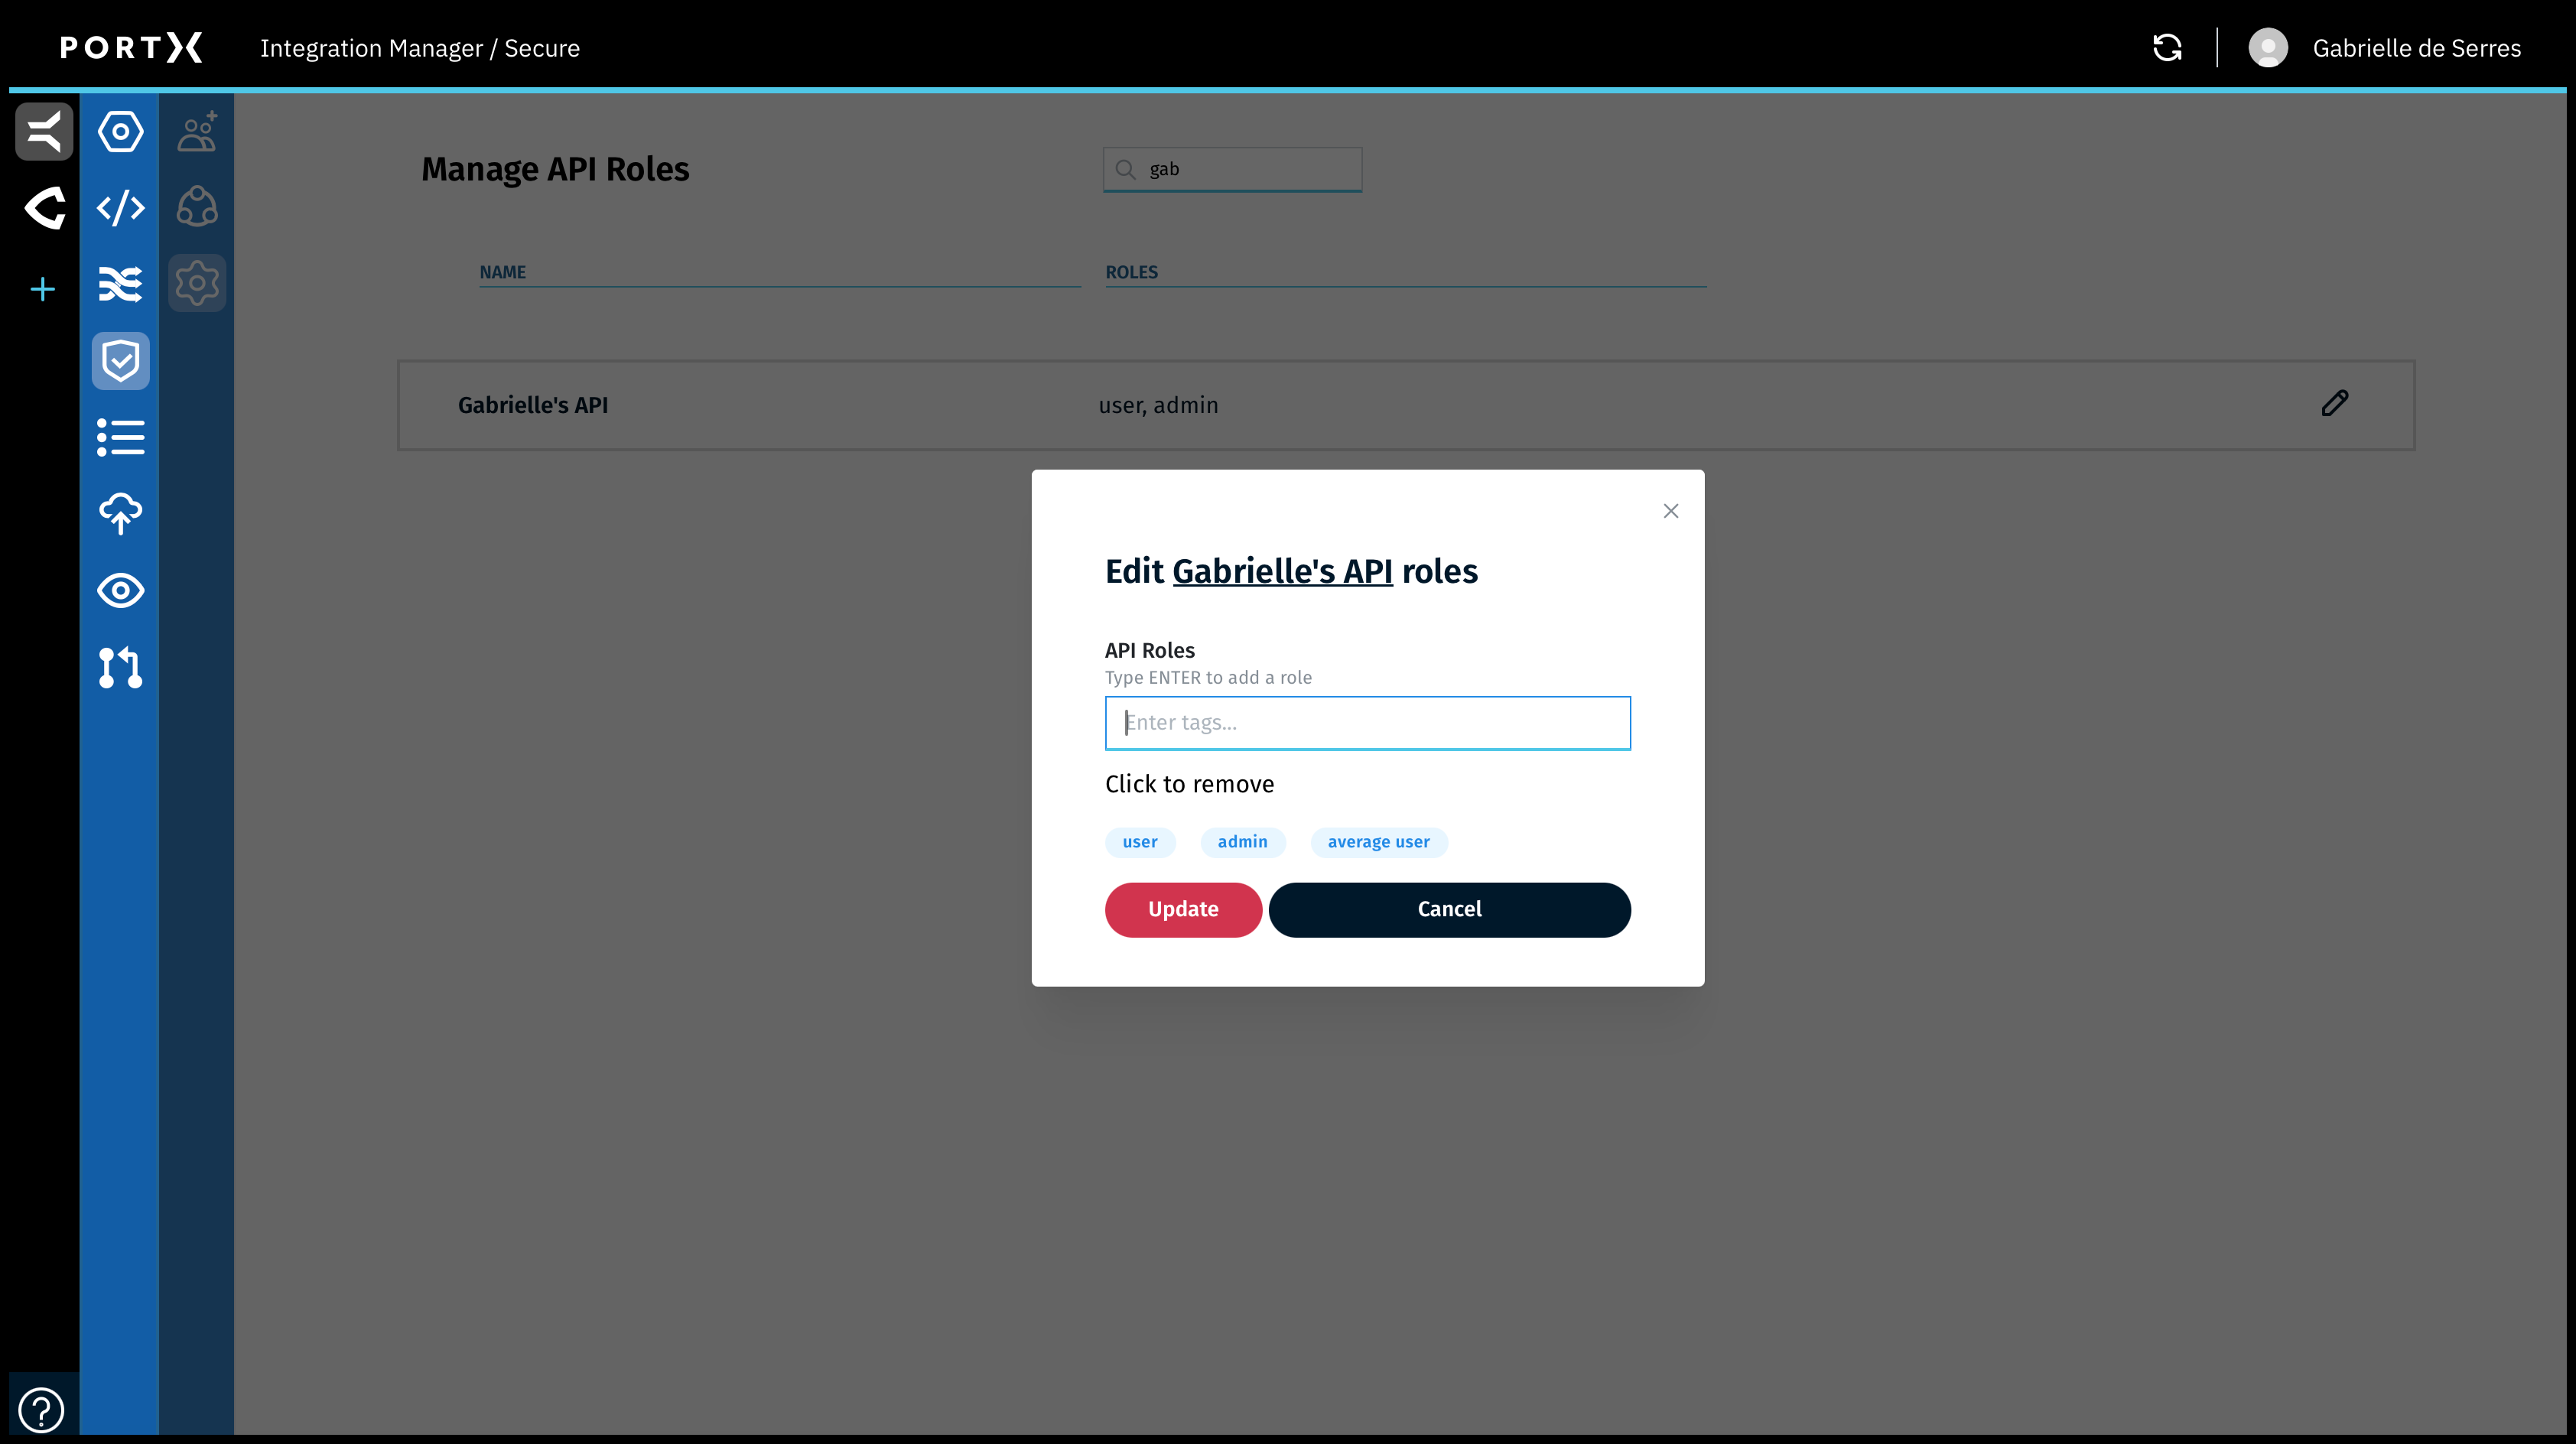
- Click on the Update button.
The confirmation window opens (as shown in Figure 56).
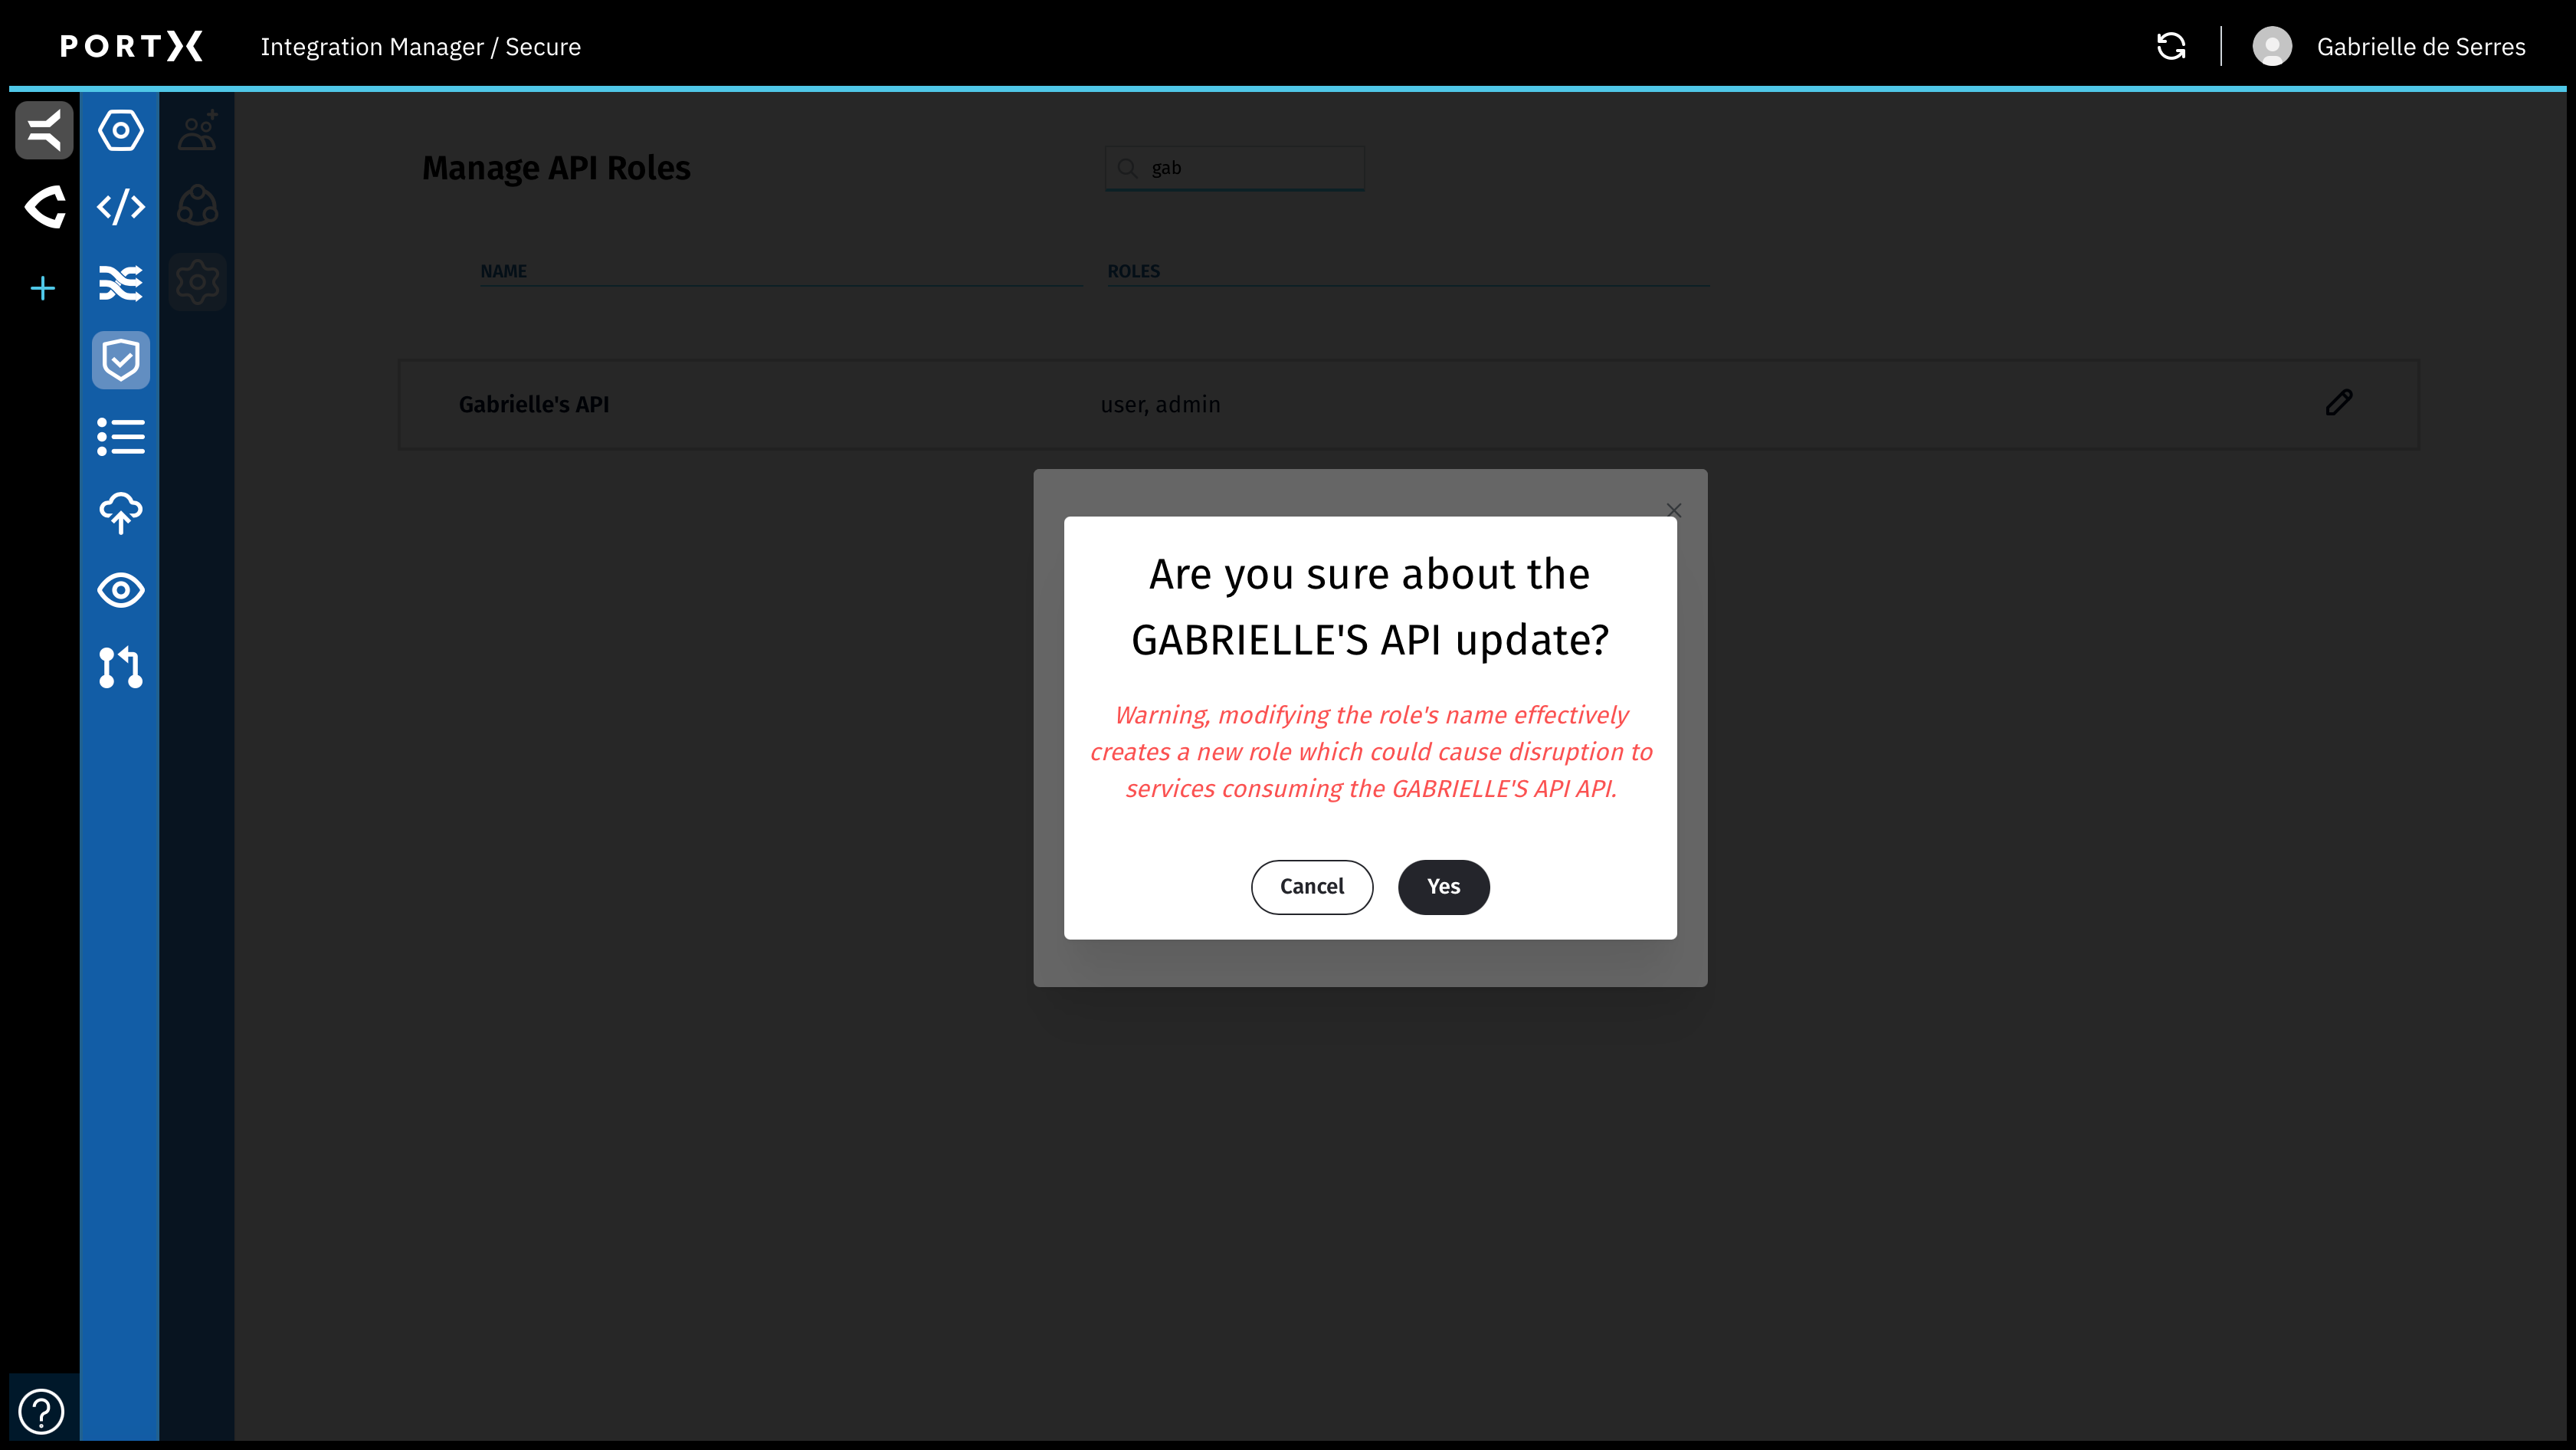
Warning: For an API in service, adding API Roles to the API can cause disruption to existing services using that API.
Click on the Yes button.
The Confirmation window closes.
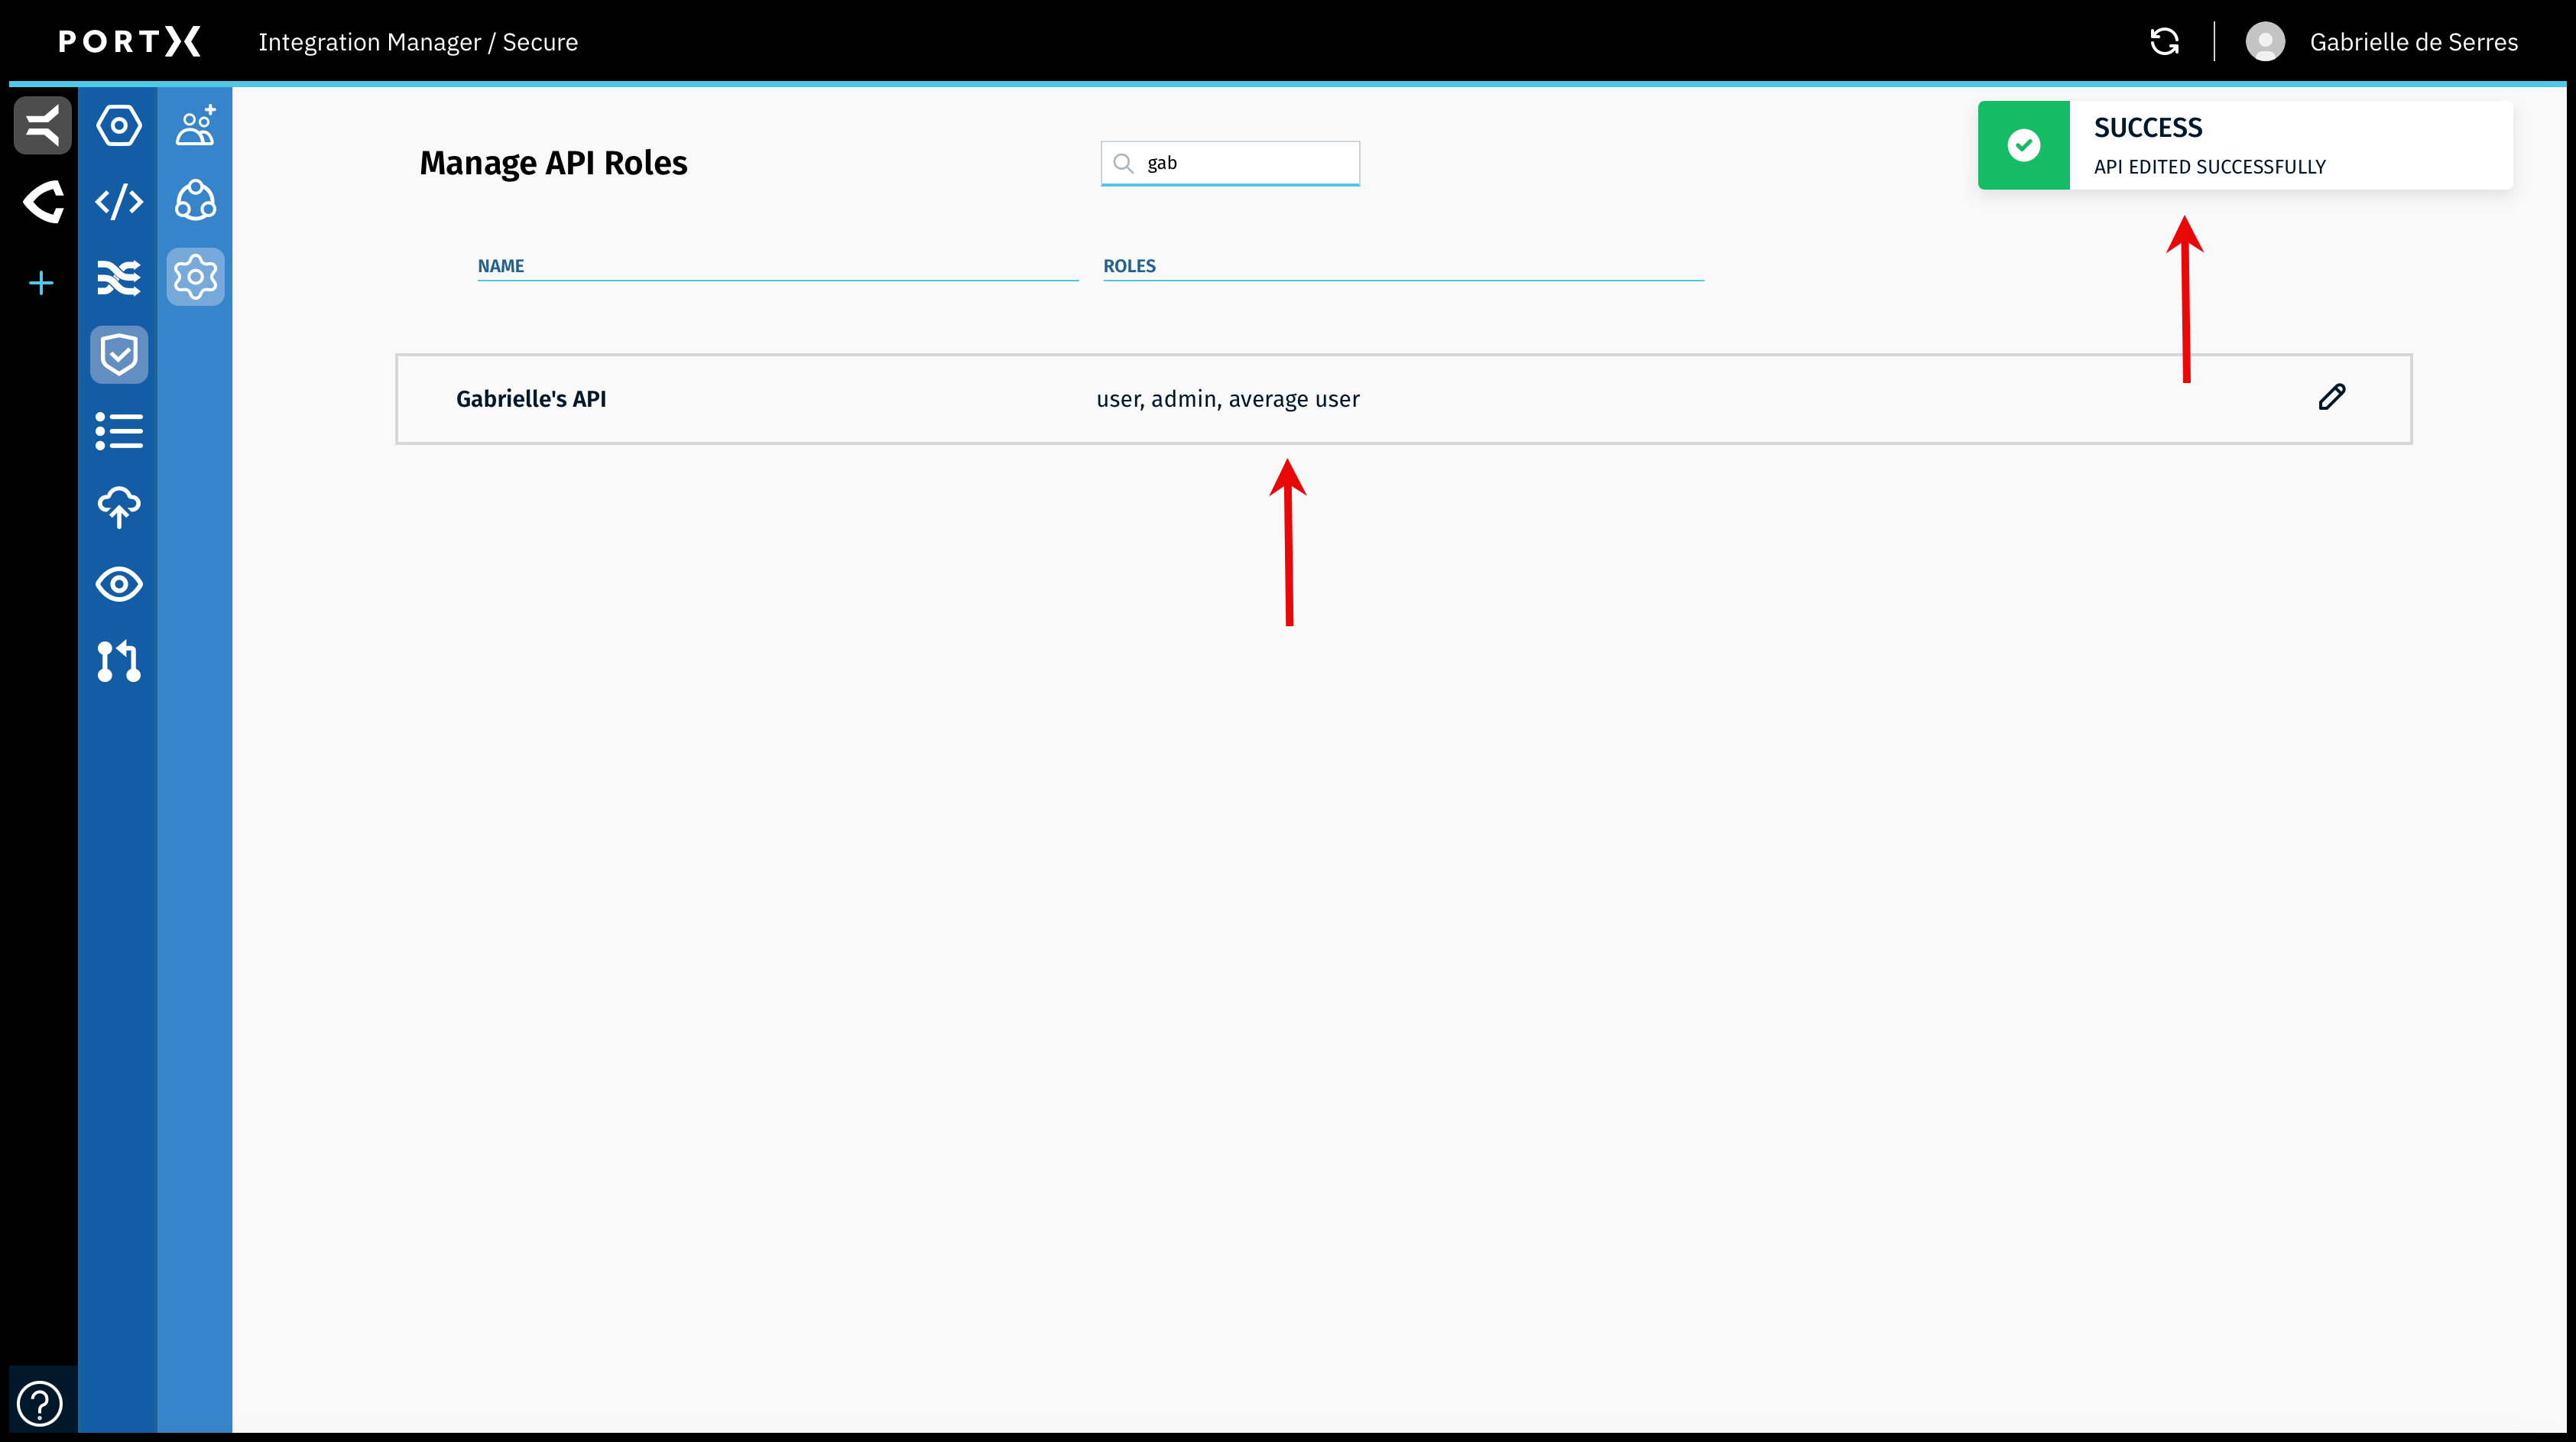
The new Role is added to the list of Roles for this specific API (as shown in Figure 57).
When you have successfully added the new API Role to the API, a confirmation Success banner message with a green check mark in the upper right of page appears BRIEFLY (a couple of seconds) as shown in Figure 57.